How to Stop Shed Condensation - A Practical Guide to Keeping Tools and Timber Dry
The Morning You Find the Rust
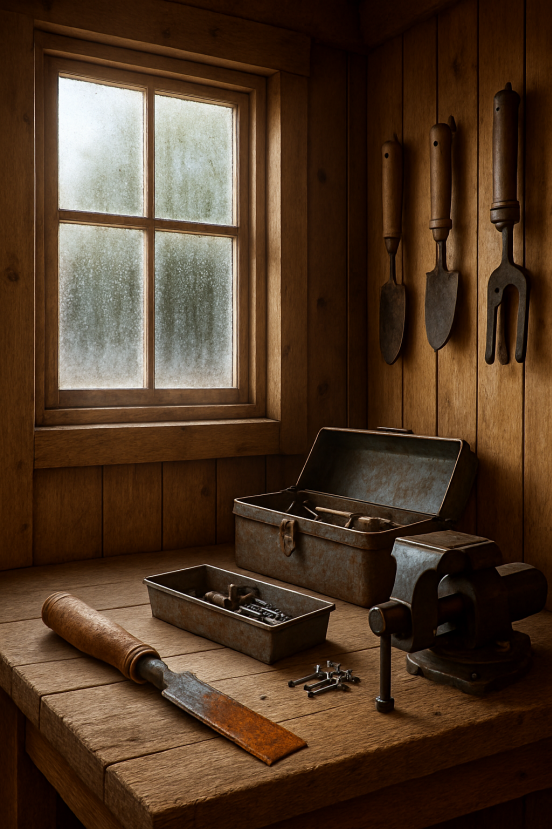
You notice it the moment you lift the lid on your toolbox. The once-bright edge of your favourite chisel has bloomed with a fine orange blush. The vice on the workbench feels cold and slightly tacky, and a few screws left out overnight have dulled.
The air has that faint musty smell that only sheds can produce - not exactly damp, but not dry either. The timber feels cool to the touch, and the inside of the window shows a light misting of condensation. You start to wonder how everything could feel so clammy.... To truly stop shed condensation, you first need to understand what’s driving it.
 The consequences of a damp atmosphere in a shed
Most people reach for a quick fix - a small heater, a cracked window, or a roll of insulation - following the familiar mantra: heat, ventilate, insulate. But that only treats the symptoms. To really stop the damp, you need to understand what's feeding it.
Why Condensation Happens (the Invisible Weather Inside Your Shed)
Condensation sounds like something that just 'happens' - a mystery of the seasons. But it follows the same rule that fog, dew and clouds do. Warm air holds more moisture than cold air. When the temperature drops overnight, the air inside your shed can't hold all that vapour anymore, so it lets go - usually onto the coldest surfaces.
Metal tools, glass windows and other cool materials collect droplets first. Timber behaves differently: it rarely shows visible condensation but quietly absorbs the extra moisture, staying cool and slightly damp to the touch. If that air can't escape, or new moisture keeps rising from the ground or seeping in through tiny leaks, the humidity stays high even when nothing looks particularly wet.
So the problem isn't just 'too much moisture.' It's that moisture has nowhere to go, and the things inside your shed can't stay warm or dry enough to resist it. This is why it’s so important to tackle the underlying conditions that cause moisture to build — the first step if you want to stop shed condensation effectively
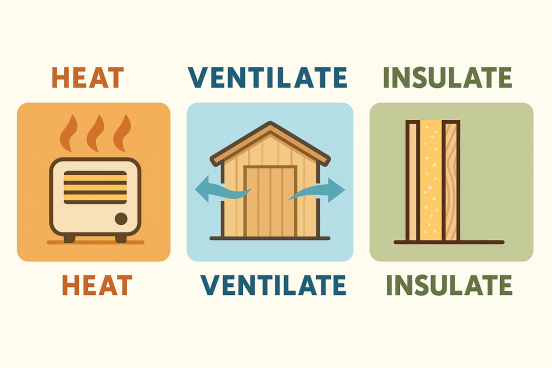
The Mantra: Heat, Ventilate, Insulate (and What Each Really Does)
You often hear people say the cure for a damp shed is to heat, ventilate and insulate. It's not bad advice - it's just incomplete. Each element plays a part, but they only work properly when the others do too.
Heat raises the temperature of the air and surfaces, widening the gap between the air temperature and the dew point. That means less chance of condensation forming - but unless that moisture can escape, you're simply holding more of it in suspension.
Ventilation gives the damp air a way out. Slow, steady airflow replaces moist indoor air with drier outdoor air - even when it feels humid outside, cold air usually carries less actual water.
Insulation keeps the shed's surfaces warmer so the air doesn't reach its dew point so quickly. It's especially useful once you start lining the shed for comfort or temperature control.
Heat, ventilation and insulation all play a part, but none of them alone will stop shed condensation unless the structure can also breathe.
 Heat, Ventilate and Insulate are Part of the solution
The Missing Step: Control the Source of Moisture
Before you start heating or ventilating, it's worth asking a simple question: where's the moisture coming from?
In most timber sheds, the floor is already raised off the ground - but that doesn't mean it's dry. Problems often start when the air under the shed can't circulate properly. Long grass, stacked pots, or paving tight to the base trap moisture and stop it escaping. Over time, the floor joists stay damp and begin to rot, adding their own slow release of moisture back into the shed.
Rain splashback is another silent offender. Without gutters or a clear gravel strip around the perimeter, every downpour drives fine spray onto the cladding. Add a few loose felt nails or a blocked gutter, and water starts creeping into corners where it never fully dries.
Fixing these small but persistent sources of moisture is often the quickest way to stop shed condensation long before you reach for heaters or vents.
So before reaching for a heater, start by clearing the airflow paths, checking the floor timbers, and keeping surface water away. Dry air begins with a dry structure.
Step-by-Step: How to Reduce Humidity in a Typical Shed
Once you've ruled out leaks and cleared the airways under the shed, you can start making real progress. Here's a logical sequence that works for most timber sheds in the British climate. Follow these steps in order and you’ll build a system that will reliably stop shed condensation through the wettest months.:
- Stop water getting in. Check the roof covering, trims and gutters first. Make sure there's a clear drip edge, and that water runs away from the base. Add a gravel strip around the perimeter to stop splashback.
- Keep the base breathing. Trim back vegetation, move stored items off the sides, and ensure a 50-100 mm airflow gap all round. The space beneath the floor should feel open, not boxed in.
- Add gentle ventilation. Fit two or more small vents on opposite walls - one high, one low - to create a steady trickle of airflow. A ridge or soffit vent can also help if you're lining the interior.
- Control indoor moisture. Avoid storing wet tools or muddy equipment. If you do, give them space and airflow to dry, not a corner to fester.
- Choose one 'active' control. Either run a small dehumidifier (set to around 60% RH) or add a low-wattage heater on a thermostat. A dehumidifier is often more efficient if the shed is well sealed; a heater suits spaces with more ventilation.
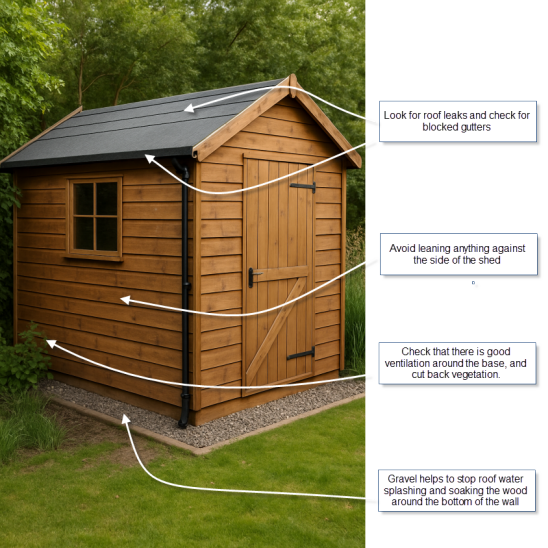 Check these points to help reduce damp
When Insulation Helps (and When It Makes Things Worse)
Insulation can be a real improvement - or a slow disaster - depending on how it's fitted. Used correctly, it keeps the shed's interior surfaces warmer, which prevents them from dropping below the dew point. That means no misty windows or chilly tools on frosty mornings.
The trouble starts when insulation is added without a vapour control layer. Warm, moist air from inside slips through cracks in the lining, hits the cold cladding and condenses out of sight. From the outside the shed looks perfect, but inside the wall cavities the insulation stays damp and the timber slowly darkens with mould.
If you decide to insulate, think in layers: outside cladding - air gap - insulation - vapour barrier on the warm side - lining. Seal joints and edges with tape, especially around sockets and switches. That simple film of plastic is what keeps the insulation dry and working properly. A proper vapour barrier is essential if you want insulation to help, not hinder, your efforts to stop shed condensation inside a lined shed.
So yes, insulation helps - but only when it keeps warm air in and moisture out.
Simple Habits That Keep a Shed Dry
Even the best setup can't fight bad habits. A few small changes make a big difference to how dry your shed stays day-to-day.
Start with what you bring inside. Wet tools, muddy boots, or freshly cut timber release a surprising amount of moisture as they dry. If you can, leave them under cover outside for a few hours first. If not, hang them up or stand them on battens so air can circulate around them.
Keep shelves clear of the walls to allow airflow behind. Avoid piling boxes tight against corners - stagnant air traps moisture. And once or twice a year, clear the floor and check for signs of damp underneath.
Finally, use a small temperature and humidity monitor. It doesn't need to be fancy - a £10 digital unit will tell you whether your efforts are working. You'll soon learn what 'normal' looks like for your shed, and when you need to step in before the damp takes hold.
Loop-Back Conclusion: Bringing It All Together
A dry shed isn't just luck - it's a chain of small, connected choices. Fix the leaks, clear the airflow, let the structure breathe, and only then think about heating or insulation. Each part supports the next, and once they're working together, you stop fighting the symptoms and start controlling the environment.
A few months after putting these steps in place, you'll notice the difference. The air feels lighter, the tools stay bright, and that faint musty smell has gone. The shed simply feels right again - not warm and stuffy, just balanced.
It's easy to blame winter weather for damp problems, but condensation starts with the way a shed is built and cared for. Understand that, and you can store your woodworking tools, motorbike gear or model-making kit with confidence, whatever the weather does outside.
Once everything is working together, you don’t just stop shed condensation — you create a shed that feels balanced and dependable all year round.
Moisture Resources
- Shed Moisture Control - Complete Guide
- How to Measure Humidity in a Shed - the first step in diagnosing condensation
- Ventilating a Shed - ventilation that helps, not harms
- Shed Dehumidifier vs Heater - what works in unheated sheds
- Metal Roof Sweating - identifying roof-surface condensation
- Bubble Wrap Insulation Problems - how some insulation traps moisture


Keep in touch with our monthly newsletter
Shed Building Monthly