How to Build a Shed Pier Foundation the Smart Way - The Secret Behind a Long Term Level Shed
The Shed on the Slope
A few summers back, we built a shed on a sloping patch of garden. The fall from front to back was almost 30centimetres too much for paving slabs, too awkward for a full concrete slab. Digging it level would have meant carting away several barrowloads of soil. Instead, we marked out a neat grid of holes, each one dug down through the topsoil until the clay felt solid under the bar.
Each hole became a small concrete pier, poured around a 24mm threaded steel rod with a big washer and nut at the bottom. When the concrete cured, we added steel plates on top and levelled them with a few turns of a spanner. The timber ring beam sat perfectly flat across them, and within a few days the shed floor was framed, solid, and level.
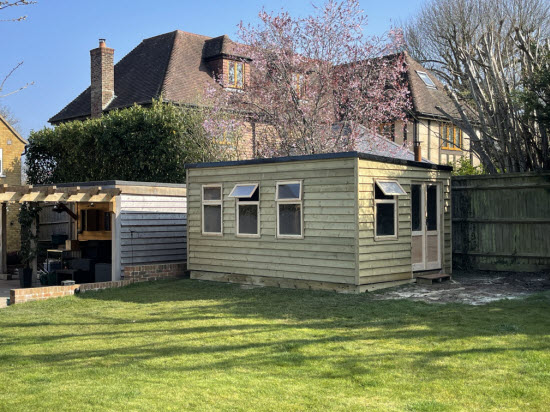 That shed, supported on a shed pier foundation with threaded rods
Three years later, that shed still sits square - doors straight, floor dry, not a millimetre of movement.
What This Article Is About
This guide explains how to build that exact kind of foundation-a concrete pier system with threaded rods and steel plates. It's a method that works especially well on sloping or uneven ground, where a slab would be overkill or impractical.
We'll cover the tools, layout, digging, pouring, setting the rods, and levelling the frame. You'll also learn why this system keeps sheds dry, level, and long-lasting - with very little waste or digging. The 'how' is simple, but it rests on a few key ideas about soil, alignment, and connection that make all the difference.
What The Shed Pier Foundation With Threaded Rods is and Why It Works
A Smarter Way to Build on Uneven GroundA pier foundation uses individual columns of concrete to carry the shed's load down into firm soil. Instead of levelling the whole site, you only dig where you need support. Each pier acts like a small column beneath a beam, and when tied together by the timber ring beam above, the whole structure becomes one rigid frame.
Concrete and Steel Working TogetherThe threaded rod system turns each pier into an adjustable support. A 24mm rod is cast deep into the concrete with a large washer and nut at the bottom. Another washer and nut hold a steel plate at the top. The plate becomes the contact point for the timber base - strong, adjustable, and dry above the soil.
This combination of concrete and steel makes a pier that's both stable and adaptable, ideal for sheds, workshops, or garden rooms on uneven or sloping sites.
Tools and Materials You'll Need
Simple Tools, Careful WorkYou don't need heavy machinery to build a pier foundation - just the right hand tools and a steady approach. A digging bar helps loosen compacted soil, while a post-hole digger lifts spoil cleanly from the hole. You'll also need a spirit level, tape measure, pegs, and string lines to set out your grid. A spade, mixing tools, and a bucket or barrow complete the essentials.
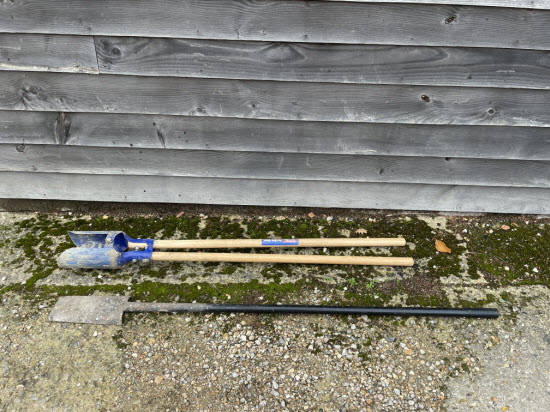 That shed, supported on a shed pier foundation with threaded rods
The Core Components of the Adjustable pier foundation system for garden sheds
Each pier uses a 24mm galvanised threaded rod, a large washer and nut near the bottom, and a 150x150x10mm steel plate on top. These plates are easy to find with pre-punched square holes.
Use standard C25/30 concrete - either mixed on-site or from pre-batched bags. For the frame, use 100x100mm (4x4) treated timber for the ring beam, joists in hangers for the floor, and weed barrier fabric beneath to suppress growth.
Planning the Grid: Getting the Layout Right
Start with the Shed, Not the GroundBefore digging a single hole, plan the grid around your shed's structure. Piers should align with the main load lines - typically under the perimeter walls and across central beams. For most sheds, spacing them about one metre apart gives good support and keeps timber spans reasonable. Use the shed floor plan as your reference rather than guessing positions on site.
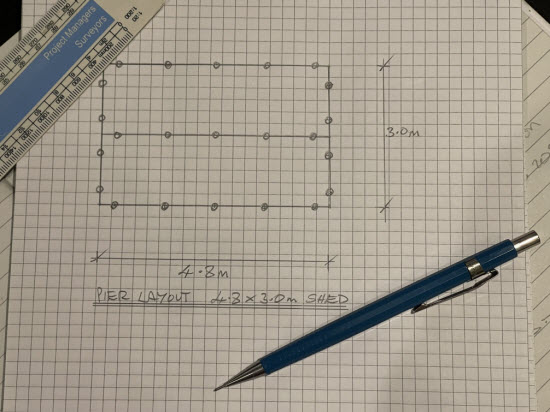 Plan the layout of your shed piers before you start digging
Find out more about the design of shed pier foundations
Marking and Squaring the Grid
Mark each pier location with pegs and run string lines to set out the grid. Check diagonals to ensure the corners are square - small errors here will show up later when levelling plates. On sloping ground, it helps to mark a reference level along the shed's front edge and measure down to estimate how much each rod will need to project.
Think Ahead About Height: If planning rules apply, remember the magic number - 2.5metres overall height. This adjustable system makes it easy to stay under that limit without sacrificing headroom.Digging the Holes: Working with the Ground
Loosen, Then LiftStart each hole by loosening the ground with a digging bar. This tool does the heavy work - breaking through roots, compacted layers, or small stones. Once loosened, use a post-hole digger to scoop out the spoil cleanly without widening the hole too much. Aim for a neat cylinder rather than a crater - it keeps concrete use efficient and strength consistent.
 Completed holes with threaded rods loosely placed
Depth and Diameter
Dig down until you hit firm, undisturbed soil - usually around 600mm deep, or deeper if needed on softer ground. A diameter of 250-300mm suits most sheds. On a slope, the front holes may be shallow while the back ones go deeper, but the pier tops should all finish level.
Managing the SpoilThere's rarely much waste. The arisings from the holes can be spread evenly under the shed footprint and later covered with weed barrier fabric. That keeps the area tidy, improves drainage, and avoids barrowing soil off-site.
Mixing and Pouring the Concrete
Choose a Strong MixFor pier foundations, aim for a solid structural mix rather than a quick-set post-crete. A standard C25/30 concrete gives consistent strength and durability. You can mix it yourself - one part cement, two parts sharp sand, and three parts clean gravel - or buy pre-mixed bags if convenience matters more than cost. Add just enough water to make it workable but not sloppy.
Pouring and ConsolidatingFill each hole in one continuous pour, rodding or tapping the sides gently to remove trapped air. Concrete should be firm enough to hold the threaded rod upright without slumping. Leave the top slightly proud of the ground so water runs away rather than pooling.
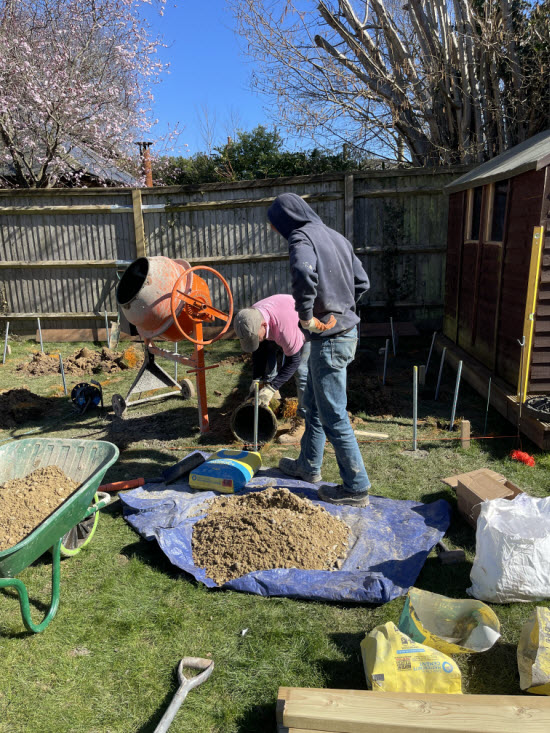 We site mixed the concrete for this project
Work Methodically
If you're working alone, pour one hole at a time and set the rod immediately while the mix is still wet. Keep everything ready - rods, washers, nuts, and plates - so you're not scrambling when the concrete starts to stiffen.
Setting the 24mm diameter Threaded Rods: Getting the Alignment Right
Fix the Rods Deep and TrueAs soon as the concrete is placed, push the threaded rod straight down through the centre until it reaches near the bottom of the hole. Fit a large washer and nut close to the rod's lower end before inserting - this helps the load transfer into the full depth of the concrete rather than relying only on surface bond. Wiggle the rod slightly to release air bubbles, then recheck that it's vertical.
Allow for the SlopeLeave enough projection above ground so the top plate can be levelled later. On a slope, the downhill piers may need several extra centimetres of thread showing. The advantage of this system is adjustability: you can set all the plates to the same level after curing rather than trying to pour perfect tops.
 The rods were sized with plenty of thread projecting out of the top. This was cut off after the beam was in place.
Check the Line Before It Sets
Use a laser or taut string line across the rods to check they're in line and roughly level. Small corrections now save big adjustments later.
Fitting the Threaded Rod and Plate Foundation - Levelling the Ring Beam
Adding the Steel PlatesOnce the concrete has cured - ideally after at least 48 hours - fit a 150x150x10mm steel plate over each threaded rod. These plates usually come pre-punched with a square hole, which makes them easy to drop into place. Add a washer and nut above and below the plate. The lower nut supports it; the upper one locks it tight.
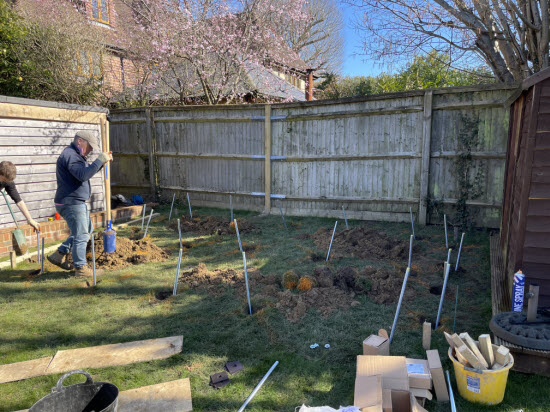
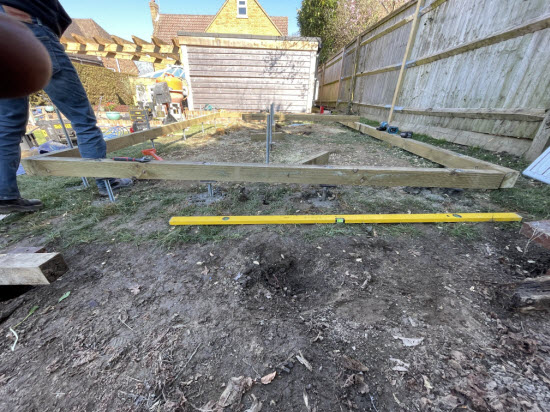 You can see clearly here how much the ground slopes. Quite a lot of spoil to be removed if this was excavated
Levelling Across the Grid
Set up a laser level or use a long straightedge and spirit level to check plate heights. Adjust the lower nut on each rod until all plates sit in the same plane. It's worth taking time here - this is the last chance to fine-tune before the timber frame goes on.
Creating the Ring BeamLay your 100x100mm (4x4) treated timber ring beam on the plates. Use washers and nuts above the timber to bolt it down securely. The ring beam ties all the piers together, turning separate supports into one solid, unified base.
Building the Floor Structure
Fixing the Floor JoistsOnce the ring beam is securely bolted down, the rest of the floor goes together quickly. Fix the joists to the ring beam using galvanised joist hangers or metal angles. For most sheds, spacing the joists at 400-600mm centres gives plenty of stiffness for standard floorboards. Before fixing, check that everything is square and that the joists sit flush across the tops of the beams.
Keeping the Height DownOne advantage of the threaded rod system is that it allows a strong, raised base while staying below the 2.5m planning threshold. By hanging the joists between the ring beams rather than above them, you keep the overall height low without losing strength or access underneath for ventilation.
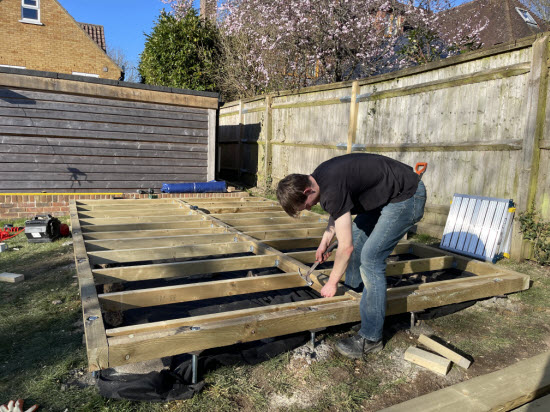 With the joists accomodated within the depth of the ring beam the height of the shed is kept to a minimu, whilst maximising internal headroom
Laying the Floor
Once the joists are in place, fit your flooring boards, checking alignment as you go. With a properly levelled base, everything fits easily - no shimming or packing required - and the finished floor feels solid underfoot.
Finishing Touches: Weed Barrier and Perimeter Details
Keeping the Underside TidyOnce the frame and floor are complete, take a moment to tidy the ground beneath. Spread any remaining spoil evenly, then cover the whole area under the shed with a weed barrier fabric. Overlap the seams generously and pin it down with pegs or offcuts. This simple step shades out sunlight, discourages vegetation, and keeps the area looking clean for years to come.
Adding Drainage and GravelA thin layer of gravel over the fabric improves drainage and stops the ground from splashing mud onto the timber during heavy rain. It also makes future maintenance easier if you ever need to check under the shed.
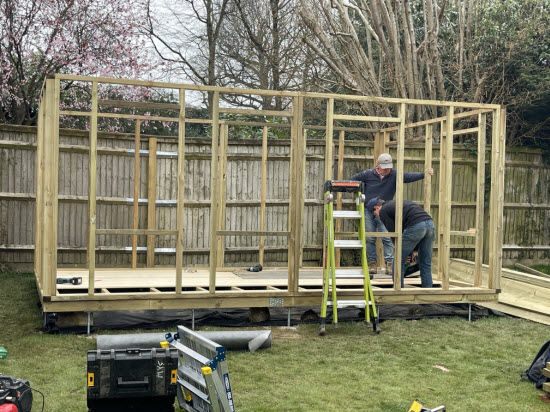 The ground is neatly covered with weed barrier whilst the superstructure is constructed
Finishing the Edges
Finally, fit treated gravel boards or trim around the perimeter to conceal the piers and fabric edges. This gives the shed a finished, intentional look while keeping the airflow open underneath - the perfect balance between neat and functional.
Why This System Excels on Sloping Ground
Working with the Site, Not Against ItThe threaded rod pier system really shines where the ground isn't level. Instead of cutting into the slope or importing tons of fill, you simply adjust the rod projections to match the gradient. Each pier becomes its own mini column, supporting the ring beam at exactly the right height. The result is a perfectly level base with almost no disturbance to the surrounding soil.
Minimal Waste and EffortBecause you're only digging small holes, there's very little spoil to move. The soil that comes out can be spread under the shed and hidden beneath the weed fabric. There's no need for shuttering, hardcore, or bulky formwork - just solid, compact piers that blend into the site.
Built-In AdjustabilityIf minor movement ever occurs over time, the nuts beneath the steel plates can be fine-tuned with a spanner. That adjustability is the quiet advantage of this system - it's simple, forgiving, and easy to maintain long after the concrete has set.
Common Mistakes to Avoid With This DIY Pier Foundation for Sloping Ground
Rushing the SetupMost problems start before the concrete's even mixed. Take time to square and level your grid, and double-check each pier location. A misplaced hole will haunt the build later when your ring beam doesn't line up. Always dry-run your string layout before digging.
Poor Concrete and Weak BondingPost-crete is fine for fence posts but too brittle for piers. Use proper structural concrete, tamped and compacted to remove air pockets. Make sure the washer and nut at the rod's base are fully embedded - this ensures the load travels through the whole pier, not just the top few centimetres.
Skipping the Level CheckIt's tempting to 'eyeball' the rods, but once the concrete sets, you're stuck with them. Always run a straightedge or laser across the rods before the mix hardens.
Don't forget drainage and weed control - skipping the fabric or gravel layer can lead to damp conditions, rot, or unwanted growth that's difficult to tackle later.
Loop Back: How to Build a Concrete Pier Foundation with Threaded Rods for a Shed
When I walk past that shed on the slope now, it's a quiet reminder that a well-thought-out foundation doesn't need to be complicated. Those twelve piers - each one with its steel rod and heavy plate - have kept the floor perfectly level through rain, frost, and heat. No cracking, no shifting, no sticking doors. Just solid, reliable support doing its job invisibly beneath the shed.
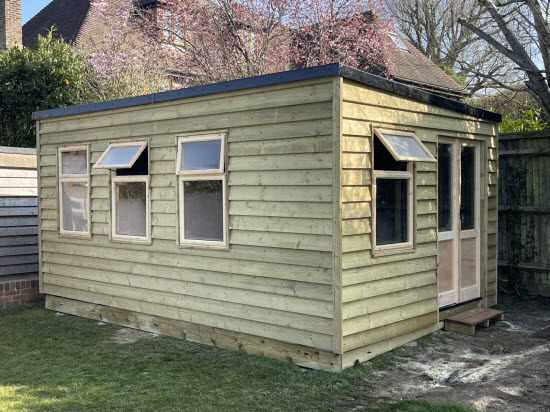 The completed shed with gravel boards around the base
The beauty of this system is how it turns precision into strength. You're not fighting the ground or relying on guesswork; you're working with the soil, using gravity and good engineering to your advantage. Every rod, nut, and plate has a purpose, and when it's all pulled together, the result is a foundation that stays true.
A day's careful groundwork can mean decades of trouble-free use. And that, more than anything, is the reward for understanding what's happening below the floorboards.


Keep in touch with our monthly newsletter
Shed Building Monthly