Why the warm shed roof method of insulating your shed roof should be top of your list and how to install one on your project
The warm shed roof method of insulating your shed roof should be one of your top roof design considerations. They are not so widely used as they probably should be, due to the historic use of shed felt on garden buildings and the general assumption that some level of leakage had to be tolerated on a shed. However with the increasing use of EPDM as a durable and long-lived roofing material this no longer needs to be the case.
A warm shed roof means that the insulation is installed above the level of the structural roof deck. This is in contrast to the 'cold shed roof' where the shed roof insulation is below the roof deck and you need to ventilate a hidden void to avoid a build-up of damaging condensation.
The warm shed roof concept means that the structure supporting the shed roof is always warm and dry, which is great for its longevity. A layer of boarding is fixed on top of the insulation and the waterproof layer is fixed to this.
The great advantage of warm roofs for simple structures such as sheds is that the roofs are normally fairly straightforward with few, if any penetrations such as chimneys, pipes or upstands. This makes the installation simple as you will see in the example below. One possible disadvantage is that it increases the height of the building but as long as you plan for this so that you don't exceed any height limitations then you are good to go.
So what are the main components of a warm shed roof?
Looking at the illustration below you can see that the warm shed roof comprises 5 layers of material. The purpose of each is outlined as follows:
1.0 Structural roof deck - This layer sits on top of the roof structure such as roof beams or purlins. On many log cabin kits (such as the example that follows!) the roof decking is attractive pine boarding that spans on to support purlins.
2.0 Vapour Control Layer (VCL) - The Vapour Control Layer is a layer of polyethylene that sits directly above the structural roof deck. The purpose of this membrane is to form an impermeable barrier between the warm moisture laden air within the envelope of the structure and the warm side of the insulation above.
3.0 Insulation - The insulation is a material that is very resistant to the transmission of heat. For most warm roofs it will be a phenolic foam board material such as Celotex or Kingspan. These boards are laid directly on top of the VCL and there is a significant temperature gradient across their depth. The underside will be at the room temperature in the shed and the top at the prevailing outside temperature.
4.0 Boarding - A layer of protective boarding is then layed on top of the insulation. This is most often a material such as OSB to which the layer above will be fixed. The boarding is fixed by long fixings, such as screws, through the board, the insulation, the VCL, the structural roof deck and into the support purlins beneath.
5.0 Waterproof layer - The waterproof layer on top of the boarding can be one of many types. The example below is for a garden office with an epdm roof but later on I show an example for a roof with bitumen shingles. For the epdm example the membrane is glued to the boarding with a water based adhesive, whereas the bitumen shingles are fixed with galvanised clout nails.
Despite having a few extra layers installing a warm shed roof is not difficult to install
The pictures below show the installation sequence so that you can get the idea of what to look for.
The first picture shows the duo-pitch roof of a log cabin to be used as a garden office. The roof deck is supported off the walls at the eaves, a mid-span purlin half way up the roof slope and a ridge beam at the apex. The tongue and groove pine boards run up the slope of the roof and the exposed wood on the underside of the roof, along with the timber walls and roof support beams is very attractive.
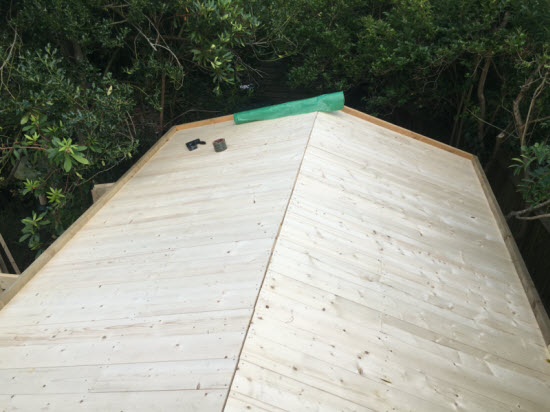 The 'warm roof deck' before starting to insulate. Note the 2x2 timber kerb around the perimeter
The first step to install the warm roof insulation is to fix a wooden 'kerb' around the perimeter of the roof. This effectively contains the insulation and forms a solid block to fix the gable and eaves to.
Within the area bounded by the kerb a 0.125mmh thick Vapour Control Layer is laid out. The length of this building was longer than the width of the VCL roll so the two sheet were overlapped and the junction taped to provide an effective seal to the passage of water vapour.
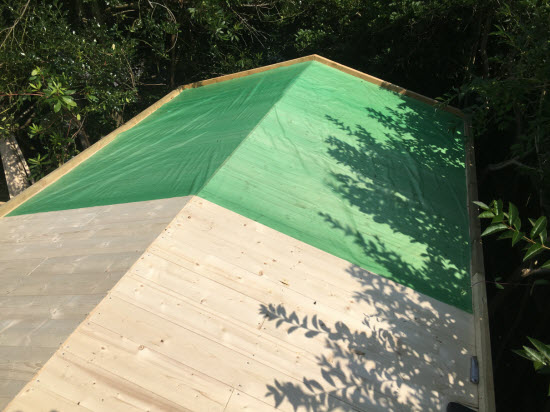 Laying the Vapour Control Layer on to the roof deck
With the VCL in place the insulation boards can be laid on top of the roof. These boards come in a range of sizes, I used a fairly standard 1.2 x 2.4m sheet and cut to them to size using a handsaw (they are easy to cut) to fully cover the roof.
 Starting to lay the insulation boards. Note the taped seam in VCL about half way along the roof.
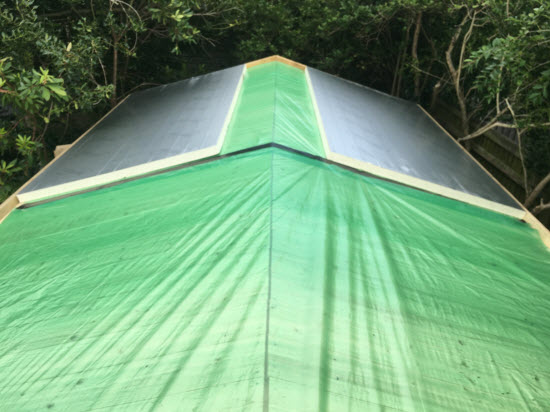
For this shed complete sheets were laid at the bottom of the slope and then lengthwise slices of the sheet were cut to infill the gap up to the ridge. The timber kerb around the perimeter stops the insulation sliding off at the eaves.
 Partially insulated roof showing central gap to be infilled by cutting the sheets of insulation to size with a hand saw.
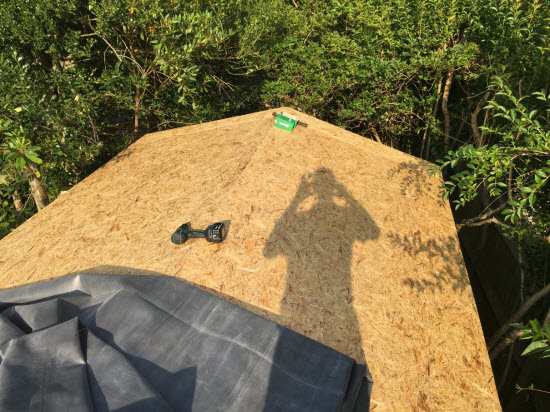
With the insulation fully installed and contained within the timber perimeter kerb, the top boarding can be fitted.
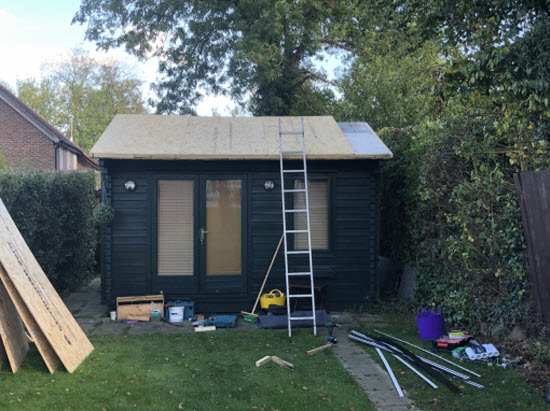
 Roof with full layer of insulation. Ready to receive the top layer of OSB board.
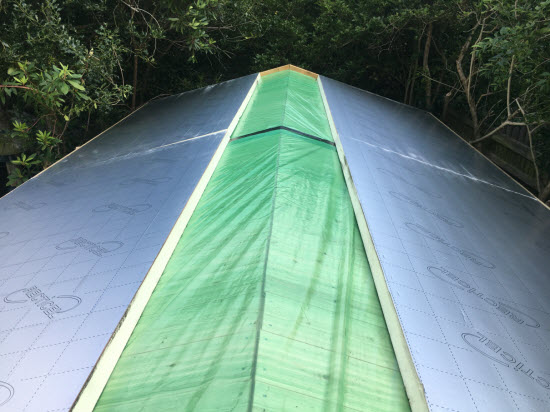
The layer of 9mm OSB is secured to the timber perimeter kerb and also through to the wall, purlin and ridge beam using 80mm long screws as described above.
 Starting to fit the OSB board. This involves a screw going through all of the roof layers into the structural roof purlins.
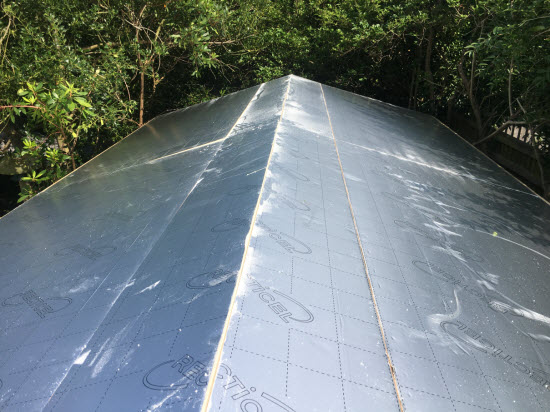
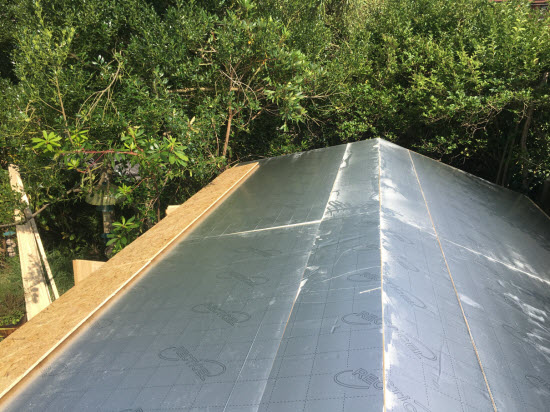
With the boarding of the roof complete the waterproof layer can be installed this follows fairly standard roofing practice.
 The completed roof, ready to start insulation of the waterproof EPDM
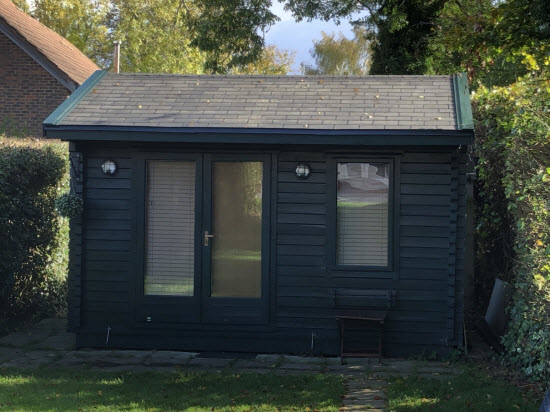
This is the completed EPDM shed roof that we have been working on
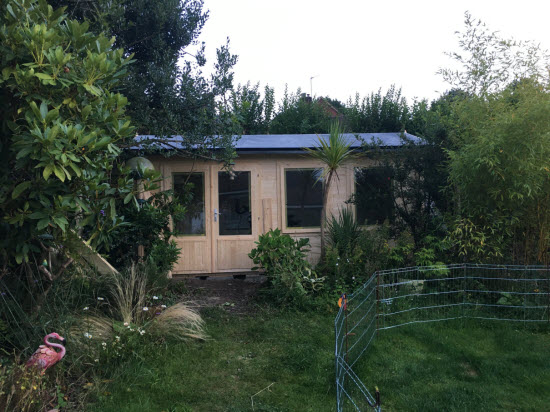 The completed warm shed roof with EPDM roof covering
Here we have a description of how to install an EPDM roof membrane and here how to install bitumen felt roofing tiles.
It is also possible to other roofing systems with a warm shed roof
Here we have a garden office with the insulation installed and I am just fixing the OSB sheathing on the top
 Log cabin office with insulation part installed
And then a few hours later with the bitumen shingles installed and all the gable trim painted and finished!
 Completed warm shed roof installation
From the outside it is difficult to see whether it is a warm or a cold roof. But from the inside the difference is apparent with the warmth and beauty of the wood on display.
Warm shed roofs often have beautiful ceilings
To conclude, a warm roof has the huge benefit that it contains the warmth of the interior of the shed keeping the roof deck and structure both warm and dry. It is especially appealing for log cabin style sheds where the internal roof structure is appealing exposed wood.
The alternative to a warm roof structure is a 'cold' roof where the insulation sits below the roof structure. This type of roof is more complex to install and is prone to the risk of condensation leading to timber decay if not ventilated properly, hence my highlighting the attractiveness of the warm roof solution here.


Keep in touch with our monthly newsletter
Shed Building Monthly