A Storage Shed Foundation That Is Easy To Build
A storage shed foundation for small and medium sized sheds (up to about 8'x6') on level ground can be built quickly and cheaply using crushed stone and pressure treated timber bearers.
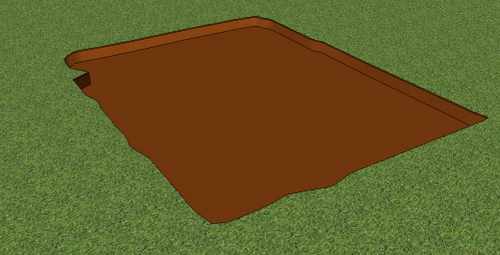
Building a shed base begins with the setting out
Start by marking out the corners of the shed. It is best to use timber pegs made from 2"x2" (50x50mm) timber, sharpened at one end. Knock a nail into the centre of each peg and set up a string-line around the perimeter. Check the rectangular shape that you have marked out by measuring across the diagonal. If the dimensions across each diagonal are equal then the corners are true squares.
There are many ways of controlling the level of an excavation, using sighting rails and optical levels. However for a small excavation like this it is best to keep it simple - a spirit level used together with a long (8' or 2.4m) 4x2 timber will be fine.
Using a spade, do an initial strip of the turf and top soil to a depth of 50mm (you can use the soil for landscaping elsewhere in the garden).
Excavate to the finished depth of 75mm in one corner and then, resting the end of the long 4x2 on this corner peg, measure down to ground level. Cut a piece of timber to this measured length. Continue the excavation, checking at intervals using the 4x2, spirit level and measured length of timber that you are not going too deep.
Selecting crushed stone for a shed base
The stone to be used for constructing the storage shed foundations should be what is known as 'well graded material'. This means that there is a good mix of stone sizes from about 40mm diameter down to very fine dust. The best material for this in the UK is sold as Department of Transport Type 1. However, for the purposes of constructing a shed, crushed stone, or pulverized concrete should be adequate. Just make sure that you don't use gravel for a shed base or a single sized aggregate as this will not compact or lock together.
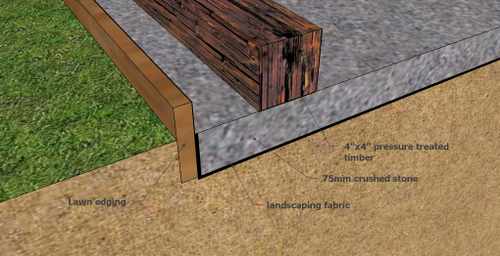
This sketch shows a detail through the edge of the storage shed foundation. The underside of the timber should be above the general ground level. The lawn edging has been included to give the shed foundation a neat appearance and make it easier to cut the grass.
|
Use of landscaping fabric is optional here for two reasons:
|
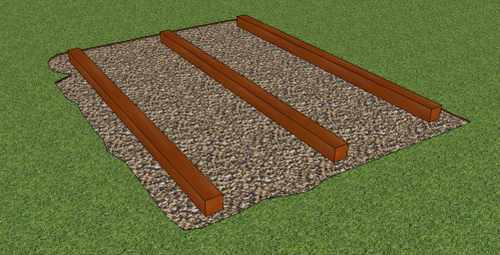
Placing the crushed stone layer.
Before compacting the stone, rake it as level
as possible. To compact the stone you could hire a vibrating plate, but if you need a bit of exercise
use a hand tamper to compact the ground. Hand tampers comprise a 10kg weight with an area of
approx 4''x4'' (100x100mm) which you raise and drop repeatedly to compact the stone. Pound
the stone down until it's compacted and even, remembering to keep checking the levels in the
same way that you did for the excavation. Add or remove material where necessary to achieve a
level platform.
Laying the pressure treated wood foundations
Check that you lay these timbers perpendicular to the direction of the floor joists in the shed floor.The pressure treated timbers should be 4''x4'' (100x100mm), to allow ventilation beneath the shed. Pressure treated timber has a long life when in contact with the ground, installing the weed barrier and stone should prolong the life of the timber. Moisture is the element that starts decay, so any thing you do to keep the timbers dry will prolong their life.
The spacing of the timber bearers should be in the instructions for the shed kit you are building or in the shed plans if you are building a shed from scratch.
My tip to prolong the life of your shed floor is to install a plastic or bitumen Damp Proof Membrane (DPM) on top of timber and nail it down. This will stop moisture getting in to your shed floor from contact with the timber skids.
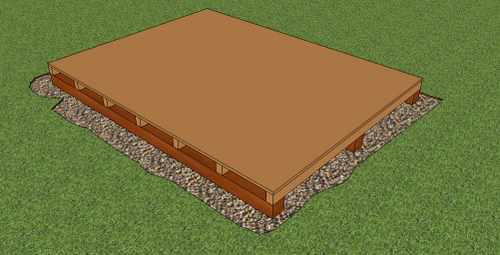
Before the storage shed foundation can be considered complete do a final check for level along the length of each timber and between timbers.
Now you are ready to start work on the Shed Floor.
However.....before you decide on the traditional have a look at a new type of shed base that can save you time, effort and money. The plastic shed base is light and easy to install and might just save you a heap of time and effort.
Related posts:


Keep in touch with our monthly newsletter
Shed Building Monthly