Installing Shed Roof Felt Seems Simple. Until It Isn’t
Shed roof felt is probably the most widely used shed roof covering in the UK. It is supplied on new garden sheds and then is the roof covering of choice when it comes time for repairs.
Read on to find out how to install shed roof felt step by step and the tools that you will need.
I repair 40-50 shed roofs a year so I will then go on to give you a few of the common mistakes I see when installing shed roof felt.
How to install shed roof felt - my step by step guide
The first step is to gather the tools and materials that you will need.
Shed roofing tools
- Claw hammer
- Tape measure
- Stanley knife
- 1.2m long straight edge
- Step ladder
- Pry bar
Shed roofing materials
- Shed felt
- Galvanised clout nails
- Shed felt adhesive
- Trim timber
- Fixing nails for trim
How much shed felt to buy?
Shed felt is normally supplied in large rolls that are 1m wide and 10m long. This size of roofing roll weighs just under 20kg, which is about the maximum for safe lifting by one person. It is possible to buy smaller/shorter roofing rolls if you shop around and you only have a small shed to re-cover.
To determine the amount of shed felt that you will need work out the area of your roof decking. There are two ways to do this depending on the type of roof you have:
For a pent roof: measure the length of the roof and multiply it by the distance from the top edge of the roof to the bottom edge.
For an apex roof: there are two slopes so work out the area of the roof by measuring the length of the shed roof, the distance from the lower edge of the roof to the apex and multiplying the two figures together for the area of one side. Double this figure to give you the total area.
When working out how much roofing felt you need allow for enough to overhang the edge of the roof by 100mm at each end and to overlap the bottom of the roof by 100mm. Also include enough for when you need to overlap sheets by at least 75mm.
How long should the clout nails be?
A typical shed roof deck will be made from roof boards or OSB that are about 12mm thick. So, using 13mm nails will be the most secure. This allows for the maximum nail penetration, without going through the roof to the underside.
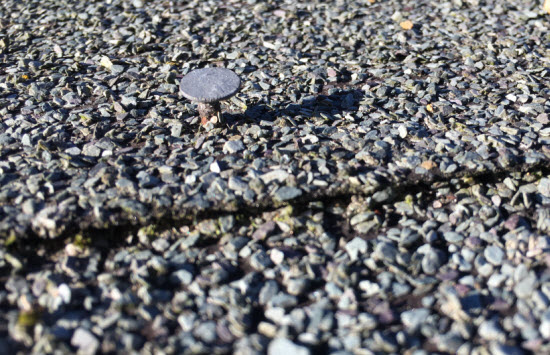
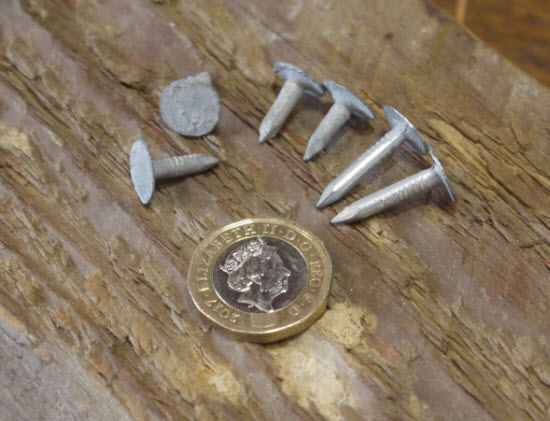 Two different lengths of clout nail (with coin for scale)
Do I need adhesive for shed roof felt?
The purpose of shed roof felt adhesive is NOT to stick the felt to the wooden roof boards. This can cause problems in the future with repairs and retaining any water that gets through the roof felt.
The purpose of shed roof felt adhesive is to seal the join where two sheets of roofing felt overlap. The adhesive is applied in a continuous line to stop wind-driven rain and water driven by capillary action up the roof slope.
The joint is then further sealed by the clout nails, passing through both layers of felt and sandwiching the roof felt adhesive between.
The roof felt adhesive also acts to help seal the gap around the edge of the nail where it passes through the shed felt.
Before you start
Plan your work so that the weather will be dry and warm, I usually check the forecast with the Met Office weather site.
Installing roofing felt isn't advisable in wet weather as you will be sealing damp into the roof structure. It's also not a great deal of fun working in the wet!
The temperature should be above 10 degrees C (50 degrees F). This is so that the bitumen impregnated felt will be flexible enough to work with and so that you will get a good smooth finish.
The first step
Your first step should be to ensure that the surface you are going to fix the felt to is clean, smooth and dry. If it is a new shed this should be a matter of just checking for any nails that haven't been driven home or any bits of mis placed wood.
If you are re-roofing a shed this will involve removing the old roofing felt. The pry bar is the most useful tool for removing old shed felt. It is great for the first task of removing fascia boards on the gable ends of the shed. A pry bar can also be used to rip the old felt by using it as a lever. A pry bar is much easier to use and quicker than a claw hammer for removing all of the old clout nails.
Once you have removed all of the felt and old nails (including on the gable ends and bottom edge of the roof!). Give the roof a once over again to make sure that the surface is clear of any sharp projects that could damage the new felt.
Step two
Now that you have a clear flat surface on which to install your shed roof felt. I normally lift the roll of replacement felt on to the roof with the roll going across the slope. This way I can get the correct length of material. I allow for the felt to over hang the depth of the roof structure and then an additional 25mm. This means that water draining off the felt wont contact the roof timber. The felt is cut to length using the Stanley / craft knife using the straight edge as a guide. You may need to make an initial scoring cut and then cut more deeply to separate the two pieces of material.
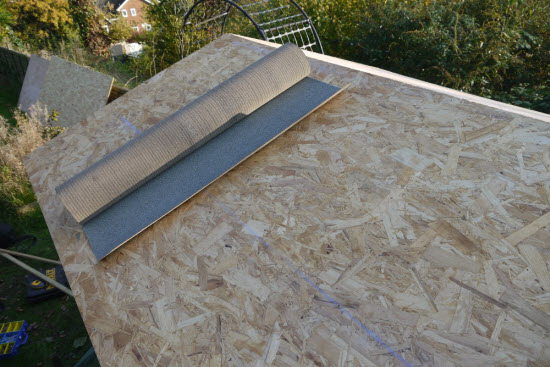 Unrolling the shed felt on the roof deck
To fit the felt, start at the bottom of the roof slope. Overhang the felt by the depth of the roof structure and an additional 2.5cm.
The first sheet is secured in place by using the clout nails at approximately 50cm intervals along the top edge. Then the ends of the felt are folded over the edges of the roof and secured with nails at 5cm intervals. Then making a neat fold at the corners secure the felt along the bottom edge of the roof.
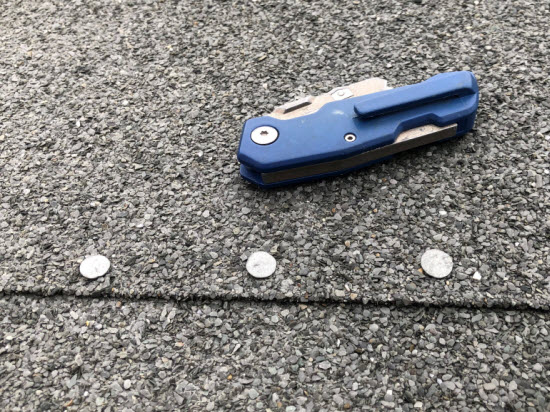 The seams between sheets use nails at 5cm spacing.
Most domestic shed roofs will require at most two runs of felt before they come to the ridge. Each run of shed felt should overlap the next by at least 7.5cm.
Overlapping sheet, shed felt adhesive sticks, felt to felt. Not felt to timber. Stops capillary action up the slope and strong winds driving water up the roof slope in between the gaps.
Step three
The third step is to install the ridge cap piece. To start this section the edge of your top piece of felt will need to be a maximum of 35cm from the ridge. This is so that you have a minimum of 15cm of overlap on to the sheet below.
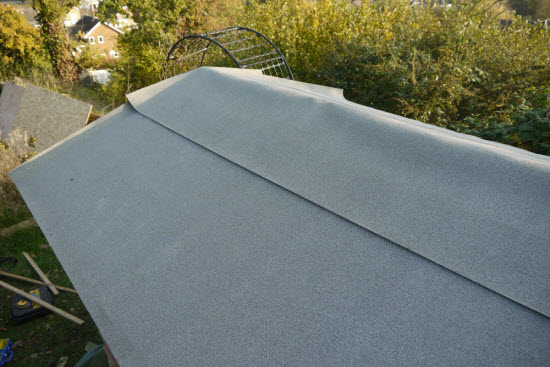 Installing the capping piece along the apex of the shed roof
To secure the overlapping sheet then use the clout nails at 5cm intervals to secure the top sheet.
Step four
To finish the shed roof installation the shed fascias need to be re-installed. The fascias serve two purposes; The make the appearance of the shed look better and finished. They also serve to reduce the risk of damage to the edge of the roof from impact damage. If some thing hits this edge it is very easy to damage the felt and initiate a leak.
The last thing is to install a roof finial.
Although not strictly necessary they do hide an imperfectly cut joint between barge boards. This final piece of the project can add an interesting feature to an otherwise very simple roof.
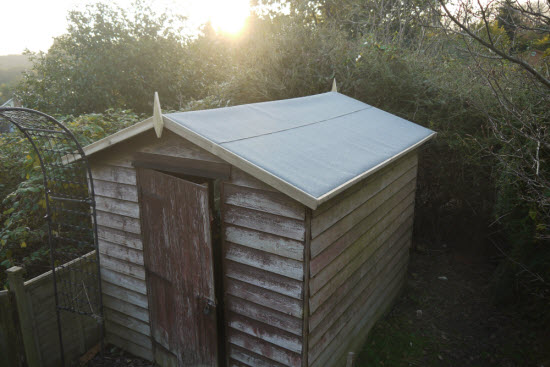 The completed shed felt roof
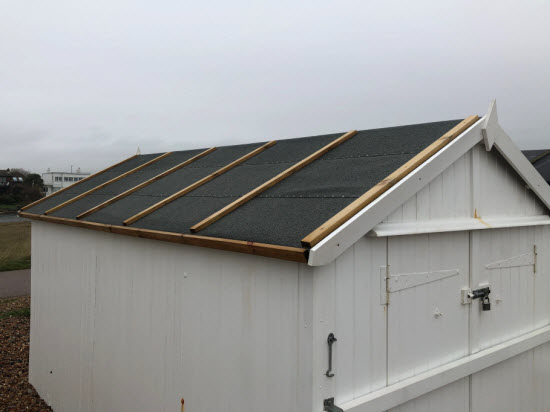 Shed felt roof with some useful timber batten reinforcement against high wind on the coast
I mentioned earlier that I repair 40-50 shed roofs each year, so I see a lot of shed roofs that have started to leak.
What are the common mistakes that occur with shed roof felt?
After a while a few common themes start to emerge from all of the leaking shed roofs that I see. Probably the biggest mistake is that we expect too much from a basic product such as shed felt
What is the life expectancy of shed roof felt?
Shed felt is not a fit and forget product. We are all used to our house roofs lasting a lifetime. in reality the life of a house roof between being re-tiled is 40-60 years. Shed roof felt isn't anywhere in the same category.
One thing that is quite clear from the marketing of roof felt, is the expected life of the product. For example, looking at the product data sheet for IKO shed felt, I found the following:
- Typical basic green mineral shed roof felt has a life expectancy of 5 years.
- The heavy duty version 10 years
- The Super polyester fibre reinforced version 15 years.
However, many shed roofs are just left there until a severe leak is noticed. By that time decay has often started to damage the structure of the roof. This then requires additional work to cut out the decayed timber and replace with new pressure treated structure.
Slope too low
Shed felt manufacturers recommend that their product is used on roofs with slopes of at least 20 degrees. This works for a significant number of apex shed roofs which have a roof slope of 20 degrees or more. If you are wondering how to check the roof slope of your shed try the velux app. It is marvellous
However most pent sheds have flat roofs with a roof pitch of 5-10 degrees and so the 7.5cm overlap of shed felt doesn't stop water getting in. For this type of shed it should have a minimum of two layers of felt, with the second layer fully bonded to the base sheet with a layer of bitumen adhesive.
Not taking off the old roofing felt
It is surprising how many shed roofs I come across with multiple layers of roofing felt. When it is realised that the roof is leaking another layer of felt is installed in an attempt to keep out the damp.
This strategy is doomed to failure. Installing more layers of felt just traps in the existing damp and promotes decay and structural damage to the supporting timbers.
Felt roofs have three main weak points these are:
Nail holes - The manufacturers recommend that the felt is secured to the roof with clout nails. The system relies on the bitumen 'self-sealing' around the nail so that water doesn't get in. Over time the shed felt becomes brittle and the self-sealing is less effective. Also the nails are relatively short and so you frequently see nails that have 'popped', leaving a lovely hole for water to get in.
Lap joints - The roof is waterproofed by a series of strips of material. The joints between these strips, even when installed with the correct 75mm overlap, are a weakness.
 Nailing the felt to the roof creates holes (this nail has 'popped!) and the joints between sheets both create potential leakage points
Brittle material damaged by uv rays - The waterproofing element of shed felt is bitumen. The parts of this material that make it waterproof disappear with prolonged exposure to sunlight. The felt becomes brittle and starts to let in water.
Conclusion
I mentioned above that I repair 40-50 shed roofs each year I should also say that I only use felt on a small number of these.
When talking with customers I come across a frustration with the limitations of using shed roof felt.
I therefore recommend to them that we use an alternative shed roofing material EPDM. This material takes just as much time to install as shed felt and the materials cost about twice as much.
However it has the following huge benefits:
It is secured to the roof using a waterproof glue and then clamped to the edges of the roof by the barge boards and a metal angle at the bottom of the roof slope. Therefore no potential leaks from nails.
It is supplied as a single sheet cut to the specific size of your shed. Therefore no lap joints to leak.
The material does not degrade in UV light. It retains its flexibility and has been used on industrial and factory flat roofs for over 40 years. So no problems with the material becoming brittle.
The final benefit is that although the material is more expensive that cost is recouped the first time you would have had to replace the traditional felt. It also saves you the cost of any water damage to the structure of the shed and its contents. And all that is before you add in the cost of your time for doing the work or paying someone else to do it for you.
More about EPDM roofing here.Read more:


Keep in touch with our monthly newsletter
Shed Building Monthly