A Shed Roof Covering For The Next 50 Years - That Doesn't Cost A Fortune
The shed roof covering on my re-cycling/wood store had come to the end of its life. I built the store about 8 years ago and covered the roof with heavy duty garage felt. This material is supposed last about 10 years so it was coming towards the end of its life.
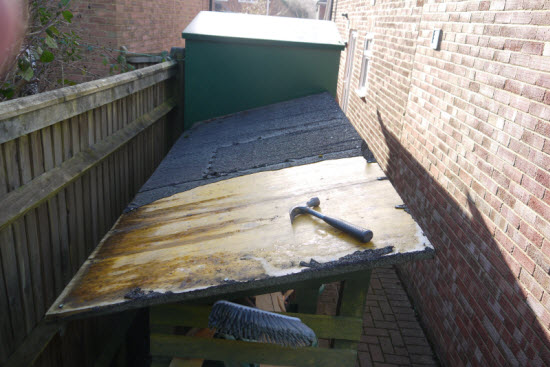
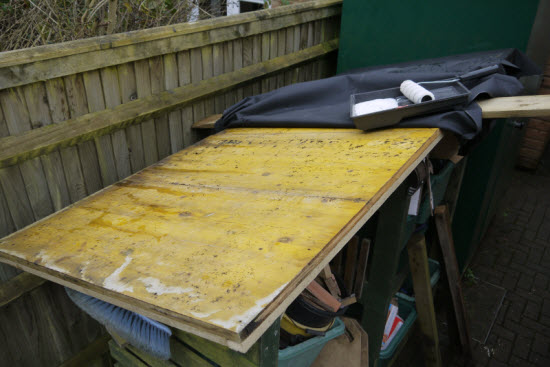
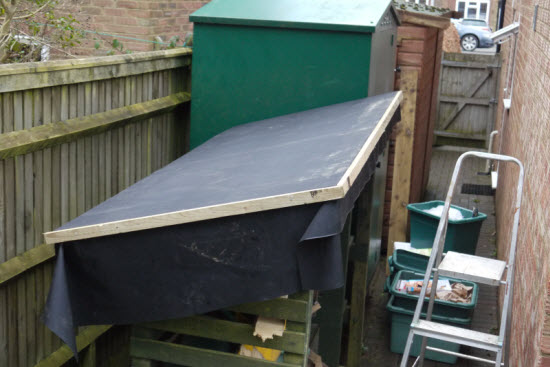
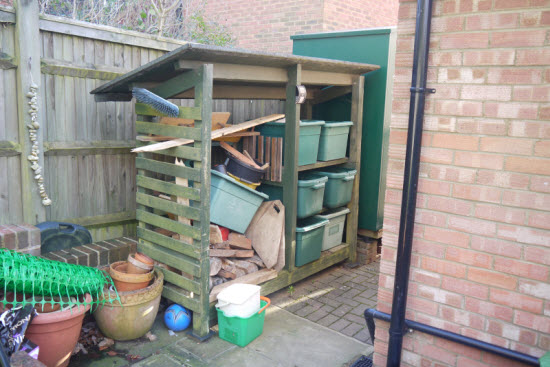 View of woodstore with roof to be re-covered
As you can see from the picture the felt had shrunk and split, it had become brittle. I would say that the roof felt had been leaking for a long time before those splits appeared. With the roof sloping away from the front like that it was only when I was doing a shed-audit that I spotted what had happened.
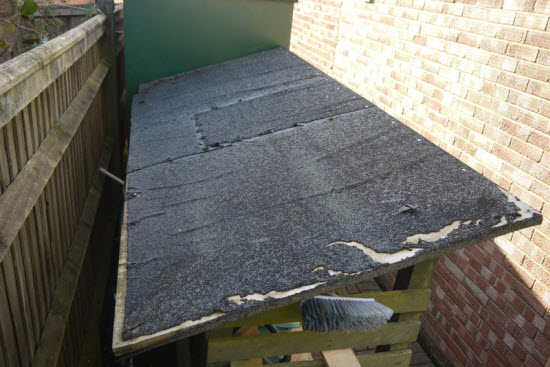 View of cracked and split roof felt
|
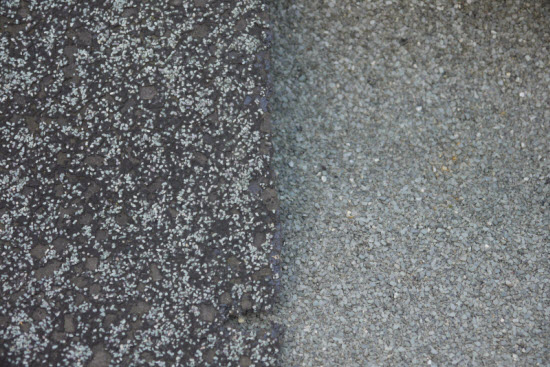
This picture shows a sample of the original felt side-by-side with the felt after 8 years of exposure. You can see that the exposed felt has lost a lot of its protective mineral coating, it has blistered and cracked. This happens very slowly over time. It is only by comparing the two that you can see the damage wreaked by 8 years of constant exposure to the elements.
|
The first task was to decide what material to use to re-cover the shed. Given how the shed felt had performed I wanted to find an alternative. My research on shed roofing shows that one of the longest lived roofing products is epdm rubber. It is also only slightly more expensive than heavy duty felt. So when priced on a cost per year basis it wins hands down.
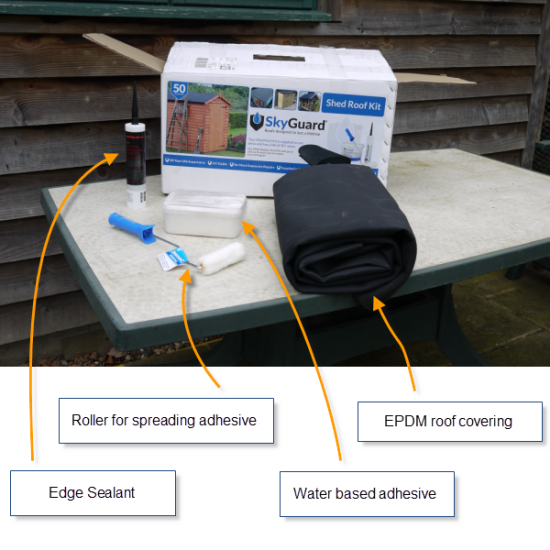
So I got myself a roofing kit which included the roof membrane, deck adhesive, roller and also a cartridge of edge adhesive.
On a dry day I started to remove the old shed roofing felt. I shouldn't really have been surprised at how easy it was to remove it.
 Removing shed roof felt
The shed felt had very little tearing resistance and of course it had many holes where it had been nailed down to the roof deck.
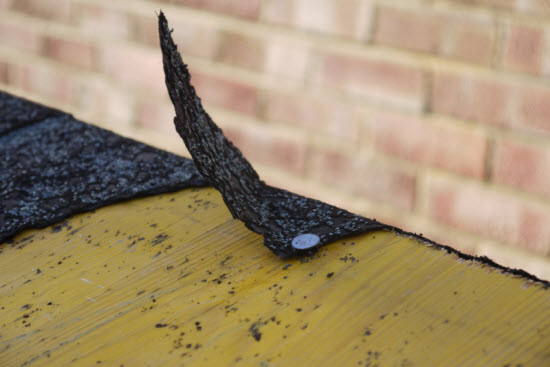 Nails used to secure felt also create potential leak and tear points.
The goal at this point was to remove all of the old shed roof covering to leave a bare roof deck. I could then assess if any repairs were needed. I was lucky in this case the plywood that I used for the roof deck was extremely durably and despite its exposure was in excellent condition.
|
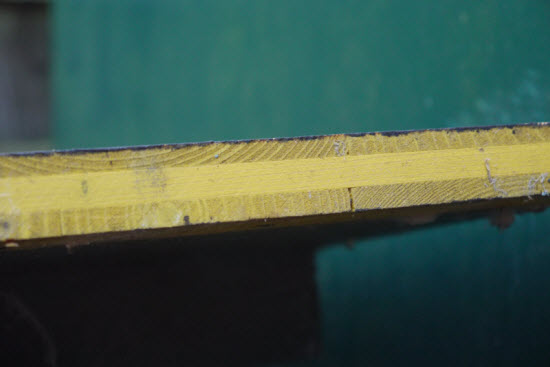
Side bar: The plywood I used is not generally available. It is a high quality 22mm thick 3ply plywood made for concrete formwork.
It is made in Austria by a company that I used to work for called Doka. I don't know what they use as a timber preservative but I had a load of slightly used plywood from them and have used it for allsorts of applications including compost heaps.
It is almost indestructible. Unfortunately I don't think it is available to retail clients and if it was it would be ferociously expensive. ;-o |

The epdm rubber shed roof covering has to be pre-ordered to the correct size for the roof. To get the right dimensions measure the dimensions of the roof (along the roof pitch if your roof has a slope) and add 300mm on to each overall dimension. This gives a 150mm overlap on each edge of the roof.
Using a full size membrane such as this has the drawback that you can't just go along to the store and buy a few rolls of material for the job in hand. However with the speed of response of companies on the internet next-day delivery is easily possible so you don't have to plan too far ahead.
The big advantage of using a single piece membrane is that there are no nail holes in the roof membrane as potential future leakage points. Which brings me to the next step.
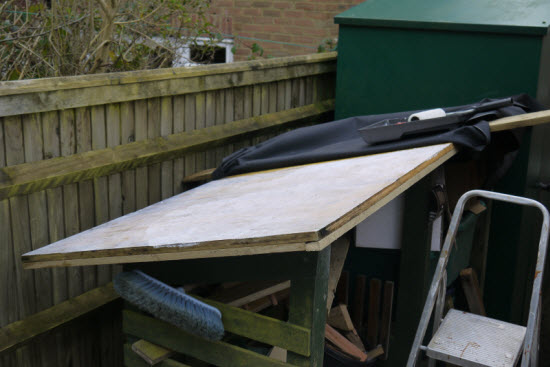
The shed roof covering is spread out on the clean dry roof deck
Nails are avoided by gluing the membrane to the roof deck.
This is achieved using the special water based construction adhesive that is supplied as part of the kit. The adhesive is poured into a paint tray and applied with a standard paint roller to give a nice even coating.
For this roof I folded back half of the membrane.
 Membrane folded back prior to applying glue
And applied the adhesive to half of the roof
 A roller is used to get an even coating of glue
After carefully laying out the new shed roof covering on the glued section of the deck. I folded back the membrane from the other side and repeated the gluing process there.
With the whole membrane glued in place, use a soft broom to apply gentle pressure to the membrane. This will smooth out any air bubbles or minor ripples. and ensure that all of the membrane is in contact with the adhesive on the roof deck.
The sticking doesn't end with the top surface of the roof
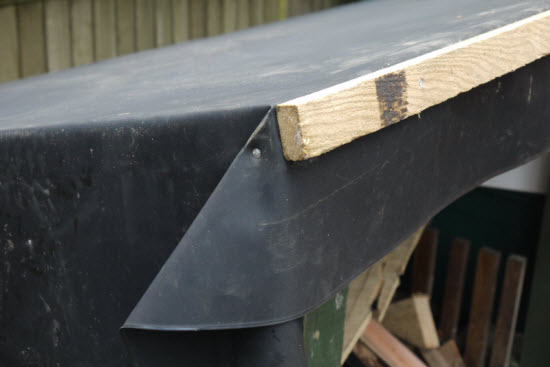
The next part of the process is to secure the edge of the shed roof covering. The first part is to neatly fold the corners and to hammer a single nail into the edge of the roof to hold it in place.
 Pinning back membrane on a typical corner
Then using rubber based construction glue (supplied with the kit) apply this to the timber edge of the roof before folding the edge of the membrane on to it. This is edge is then protected by a timber batten/edge trim which can be nailed or screwed in to position.
 Fixing a typical batten in place
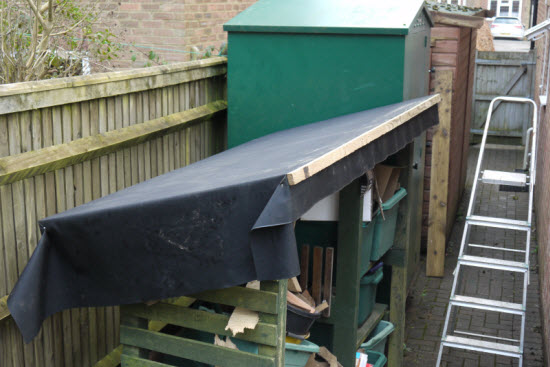
The gluing of the membrane to the roof substrate and the fixing of the battens continues on to each of the four edges of the roof.
 Battens fixed all round edge of roof, with membrane hanging down
The fixing of the shed roof covering is now complete but the excess roof membrane needs to be cut off at the underside of the batten. The tool for doing this is a pair of scissors. The epdm membrane is so tough that using a Stanley/craft knife is difficult. You will need the shearing action of the scissors to cut this material.
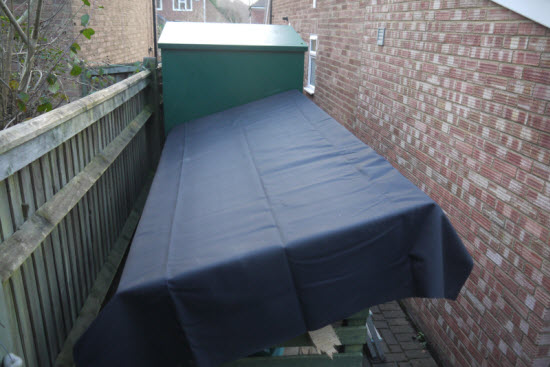
Trimming the excess membrane neatens up the edge of the roof and gives a great finished look (good for the next 50 years!).
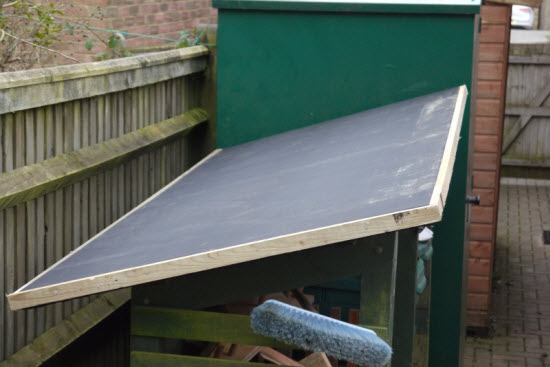 Shed roof re-covered and ready for anything!


Keep in touch with our monthly newsletter
Shed Building Monthly