Garden Shed Shelving Ideas: Store Your Gear Without Losing Your Mind
The Watering Can Test
Garden shed shelving ideas can completely change how you use your space. It always starts the same way. You pop out to the shed to grab the watering can. But it's not where you left it. Instead, it's wedged behind a collapsing compost bag, a tangled hose, and three half-empty tins of creosote. You end up hauling everything out, knocking over the spade, and muttering under your breath. Fifteen minutes later, the watering hasn't even begun - and you've kicked the shed door in frustration.
Most of us don't plan our garden shed storage. We just add shelves when things start falling over. But the right shelving - placed thoughtfully - can change everything. This article is about smart, practical shelving ideas that make your garden shed work with you instead of against you. Whether you're storing tools, chemicals, or random garden gear, we'll show you how to get it all off the floor, easy to see, and a pleasure to use.
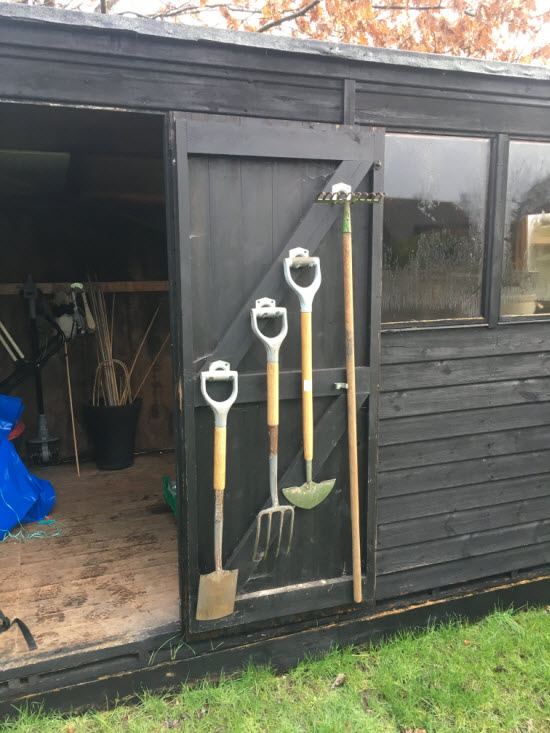 Just by opening the door of this, some frequently used tools are easily accessible.
What's Different About Garden Shed Storage?
Not all shelving is created equal - and garden sheds are a different beast from workshops or storage units. They're often damp, dusty, and host to a rotating cast of seasonal gear. One month it's seed trays and fleece; the next it's slug pellets and hedge trimmers. And then there's the mud - on boots, tools, and everything else that comes through the door.
Unlike a tool shed, where things are fixed and precise, or a storage shed that holds clean boxes, a garden shed needs to breathe. Shelves here need to shrug off moisture, hold awkward items, and keep garden chemicals safely out of reach (especially from pets and kids). It's not about packing in as much as possible - it's about making the space easy to use all year round.
In short: your shelving needs to be strong, simple, and forgiving. The rest of this article shows you how.
Quick Wins: Off-the-Shelf Systems That Work
If you want instant order without getting out your saw, off-the-shelf shelving units can be a smart start - especially in small or standard-sized garden sheds. You'll find options in most DIY stores, and the right one can be in place in under an hour.
Plastic freestanding units (like those from Keter or B&Q) are lightweight, affordable, and won't rust. They're great for storing plant pots, tubs of feed, or gloves - anything that's not too heavy. Just don't overload them or leave them sagging under a crate of tools.
For something tougher, galvanised steel shelving offers excellent strength and durability. It's ideal for heavier gear or stacked compost bags - and often adjustable to suit different item sizes.
If your shed suffers from damp, wire or slatted racks are a solid choice. They allow airflow around stored items, which helps reduce mould and keeps your gear dry - especially useful for garden chemicals or anything that sweats in plastic tubs.
DIY Shelving: Best Materials for Damp, Dirty Sheds
Building your own shelves might take a bit more time, but it gives you full control over size, layout, and strength - and it's often cheaper and tougher than shop-bought systems.
The key is choosing materials that can handle moisture and muck. Avoid MDF and chipboard - they soak up damp like a sponge and swell or crumble over time. Instead, go for OSB (oriented strand board), exterior-grade ply, or treated softwood. These materials are robust, forgiving, and readily available in most timber yards.
A basic shelf made from a pressed metal shelf bracket, fixed to the shed's framing, with a pine floor board for the shelf will hold a surprising amount of weight.
Finish is optional - raw boards are fine - but a quick coat of shed paint or clear preservative helps them last longer in a damp garden environment.
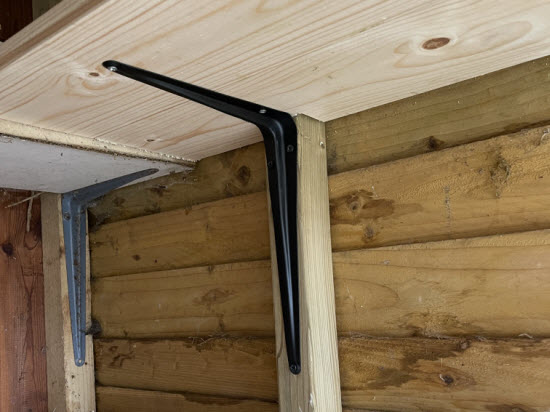 Simple garden shed shelving system
Deep vs Shallow: How Shelf Depth Affects Usefulness
It's tempting to build the deepest shelves you can fit - more storage, right? But too-deep shelving often backfires. Things get buried, lost, or knocked over as you reach past them. That tin of slug pellets? Gone behind a jungle of sprayer bottles and feed tubs.
Here's a better way to think about it:
- Shallow shelves (150-250mm) are brilliant for hand tools, seed packets, gloves, and small pots. You can see everything at a glance and nothing gets hidden.
- Medium-depth (300-400mm) gives you enough room for larger containers, plant food, and spray bottles without feeling overstuffed.
- Deep shelves (500mm+) are only useful if they're low down and for big, rarely-used items like compost bags or a watering can that doesn't fit anywhere else.
When in doubt, go shallow and stack upward. You'll use your space better - and stay saner in the process.
Tiered Storage: Making Use of Vertical Space
The floor of your garden shed fills up fast. But look up - most sheds waste a lot of vertical space. That's where tiered storage comes in.
Ladder-style or A-frame shelves are perfect for stacking gear upward without blocking light or movement. They work especially well in corners, where space is often underused.
Above-window shelves give you a handy spot for light, infrequently used items - spare pots, twine, or netting. Just make sure they're not overloaded, and fix them securely into the framing.
And don't overlook the ceiling. A pair of strong battens can hold a net or mesh sling for storing fleece, canes, or lightweight seasonal items like watering trays or bird netting. You can even install bike hooks to hang bulky tools by their handles.
Tiered storage makes your shed feel bigger - and puts more gear within arm's reach without the clutter.
Garden Gear That Doesn't Belong on Shelves
Some things just don't sit well on shelves - literally. Long-handled tools, compost bags, and awkward items like watering cans tend to slide, tip, or fall.
For long tools like spades, forks, and hoes, fix a simple tool rail or batten with hooks along the shed wall. You can buy rubber-grip clips, but a few sturdy nails or U-hooks work just as well.
Compost, gravel, or bark bags are heavy and floppy. They're best stored upright in a timber-framed bin or open crate on the floor - something that keeps them tidy but lets you grab and go.
As for watering cans, trugs, and hose reels - hang them. A strong wall hook or ceiling hanger keeps them off the floor, dries them between uses, and saves you that ankle-twisting shed shuffle.
Shelves are great, but knowing what not to put on them is just as important.
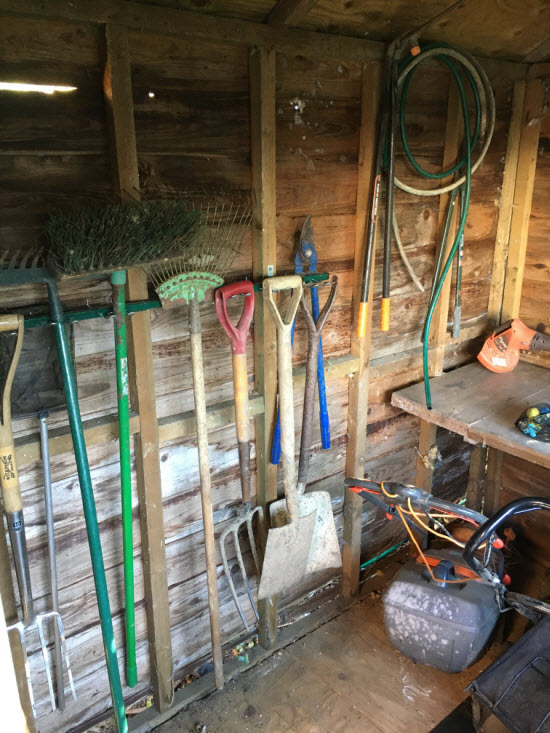 Use the shed wall to hang long tools on so the floor isn't cluttered
Shed Wall Types Matter
Before you start fixing shelves or hooks, take a good look at your shed walls - because how and where you screw things in really matters.
Always fix shelves into the studs. These vertical framing members are your structural support. Never fix shelving directly to external cladding - not only is it too weak, but you'll risk damaging the shed's weatherproofing.
To add flexibility, you can fix horizontal planks or old floorboards between the studs. This gives you a solid fixing surface for hooks, hangers, and light racks, without being locked into the stud positions. It's a neat way to create more usable wall space while keeping the structural load where it belongs.
If you spot condensation or damp patches, don't just work around them. Investigate. It's often a sign of poor ventilation, faulty cladding, or overflowing gutters. Fix the root problem now - before it wrecks your shelving (and your tools).
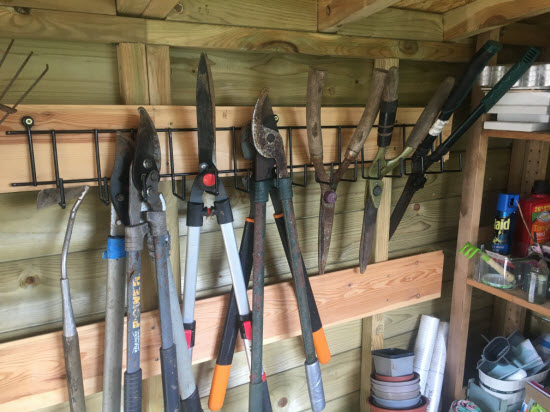 These planks fixed horizontally to the shed wall studs allow ventilation and for the fixing of a tool rack that doesn't match the wall stud spacings
Clever Add-ons and Low-Cost Upgrades
Once your main shelving is in place, small add-ons can make a big difference - especially for the fiddly stuff that never seems to have a home.
Hooks are great for keeping secateurs, shears, and small hand tools visible and off the shelf. No more rummaging in trays or stabbing yourself on hidden blades.
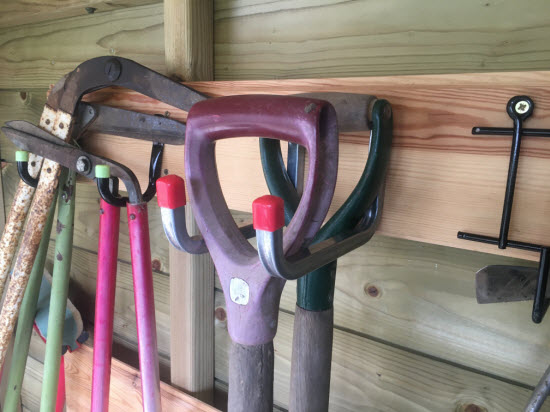 Hooks like these are a cheap and easy way to hank awkwardly shaped tools
Plastic bins or cut-down crates under shelves give you a simple, slide-out place for gloves, twine, and feed packets. Use screw-on cup hooks under shelves to hang string, brushes, or plant labels.
Got seeds, fixings, or fiddly fittings? A small drawer unit, like those used in garages or craft rooms, can bring order to the chaos - and they're cheap and easy to mount.
None of these upgrades take long, but they turn a decent shed into a shed that works - the kind where you know where everything is, and everything has its place.
The Watering Can, and Why Garden Shed Shelving Ideas Matter
So... where's the watering can?
It's exactly where it should be - hanging on a hook near the door, next to the hose and just above the crate of compost. You walked in, grabbed it, and walked out again in under 20 seconds. No muttering, no tripping, and definitely no unpacking half the shed just to find it.
That's the power of well-thought-out shelving. Not fancy, not over-engineered - just practical, sturdy, and tailored to the way you actually use your garden shed. Whether it's freestanding units, DIY shelves, smart hooks, or a simple plank fixed between studs, every decision adds up to a shed that feels calm, capable, and ready for work.
Because the less time you spend hunting, the more time you get to enjoy your garden.


Keep in touch with our monthly newsletter
Shed Building Monthly