How To Make a Framed Ledged And Braced Shed Door
A framed ledged and braced shed door is stronger than a basic ledged and braced door. The thick vertical frame members on each edge of the door give it additional strength to resist unwanted entrants levering it open and also help to stop the shed door warping.
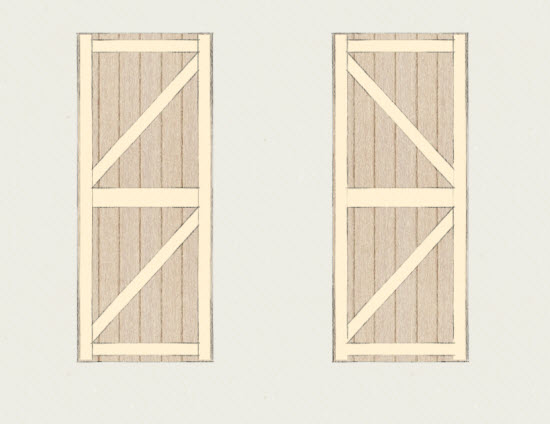 Two layouts for a framed ledged and braced shed door. But which is best?
Traditionally, framed ledged and braced doors are made using mortice and tenon joints to connect the vertical and horizontal members. Mortice and tenon joints are strong and last forever but can be time consuming to make if you don't have specialised machinery.
For shed doors, which are relatively light, used much less frequently than many doors and to less exacting dimensional tolerances, there is an alternative to mortice and tenons. This method makes a strong door that is much more secure than the basic ledged and braced shed door.
Let's take a look at the Framed, Ledged and Braced shed door
The picture below shows a framed ledged and braced shed door in-situ. This door is made using standard 3x2" pressure treated lumber for most of the frame members. It uses 12mm thick pressure treated shiplap for the front panel which is nailed in place with 50mm long galvanised ring shank nails.
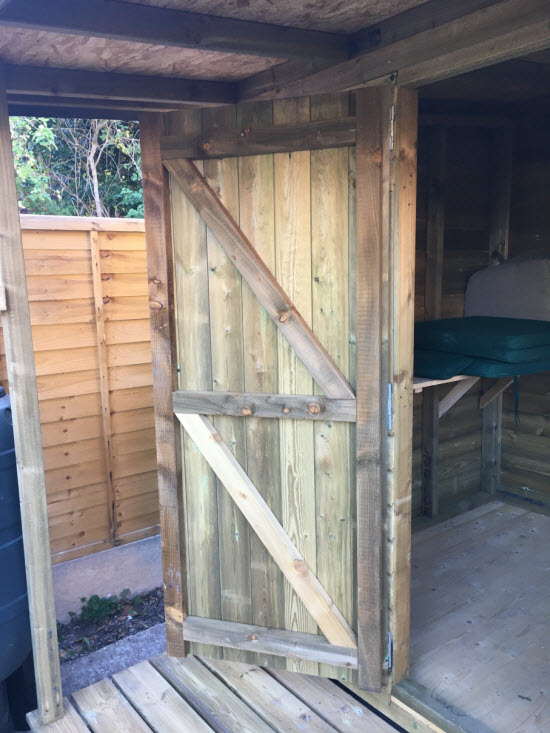 Framed ledged and braced door in-situ with braces sloping up from the hinges
The frame members are connected securely but don't use mortice and tenon joints.
How to make a Framed Ledged and Braced door without mortice and tenon joints
The secret to making this door is a fixing called the timber screw. Timber screws are long, relatively large diameter screws which have a self-drilling point, so don't need to be pre-drilled.
Timber screws need a fairly strong torque to install them and are installed with a powered drill/driver or impact driver. To this end a normal Phillips type cross head isn't enough so they use a hex head or a wafer head with a recessed Torx fitting. Both of these types of head enable enough torque to install the long screw without it jumping out.
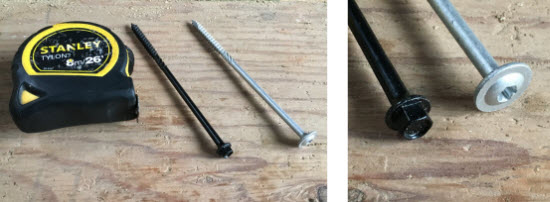 Picture of two 150mm long timber screws. The one on the left is a 'hex' head and the one on the right is a 'Wafer' head with Torx drive
I prefer the wafer head screw over the hex head as the head sits flush with the surface of the timber and there is no need to counterbore.
How to make timber connections
The connections of the frame members are made with two screws per joint. The joint is further strengthened by not having the two screws parallel. This makes the pair of timber screws work together as a sort of 'dovetail' to improve the strength of the joint in tension.
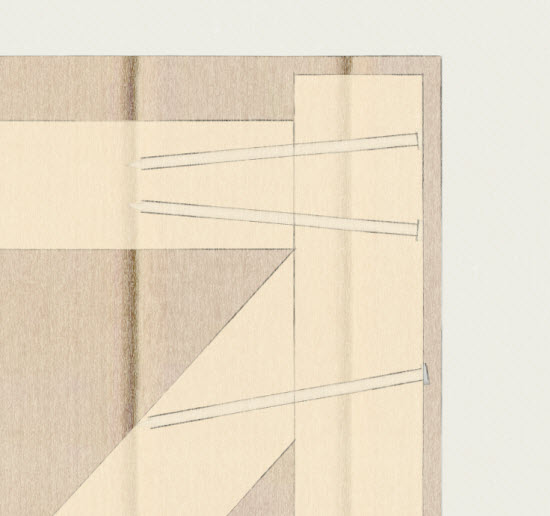 X-ray view of timber screws securing joints
The basic framed ledged and braced shed door frame is shown in the picture below. It comprises of two uprights, three horizontal members and two braces.
When it comes to the braces I cut these as shown with the connection on to the vertical. I do this to avoid the screws clashing with the fixing between the vertical and horizontal members.
If you are going to use a long throw lock such as a Gatemate to secure the door make sure to use a 4x2 for the vertical member on the opening edge. The extra width of the 4x2 gives the required space to accommodate the body of a Gatemate lock. In my view these locks are one of the best ways to secure a shed door.
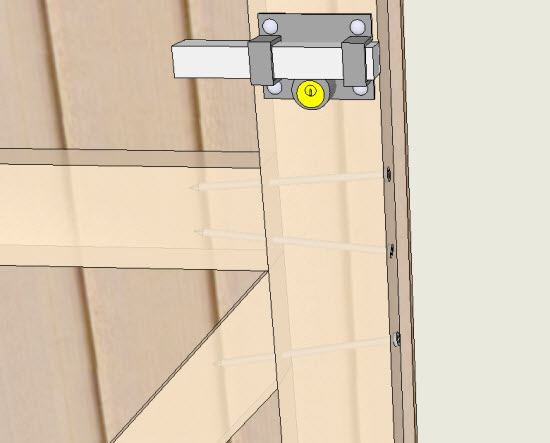 The Gatemate lock fits above the middle frame connection
Fitting the timber door braces
It is important that at least one of the framed ledged and braced shed door braces slope up from the hinge. In an ideal world both braces slope up as in the left hand picture. You will sometimes see shed doors with one hinge sloping each way the reason for this is that the supplier doesn't know which side the door is going to be hung, fixing the braces that way means that at least one of the hinges will be right.
The other option would be to supply the braces 'loose' and for them to be fixed in position when the door is installed. However, this needs the installer to understand which way round the braces should go. Many manufacturers decide to take matters into their own hands and have one brace sloping each way.
The door frame on the left is the strongest with braces sloping up from the hinges
Key dimensions for your framed ledged and braced shed door
When it comes to dimensions. There isn't such a thing as fixed dimensions for making a shed door. My thoughts on this are that the maximum width for a single leaf is about 900mm (3 feet). Above this width the door gets too heavy and unwieldy and you should opt for double doors. I generally use a width of about 2'6" about 750mm.
The height of the door isn't fixed either I would say a good range of door heights is between 1680 for a small shed and 1920 which is a standard door height.
In terms of clearance between the door and its frame then an allowance of at least 10mm all-round between the edge of the door and the should give you a reasonable amount of tolerance to allow for seasonal movement of the timber. Also allow for the door to over lap the frame by about 15mm.
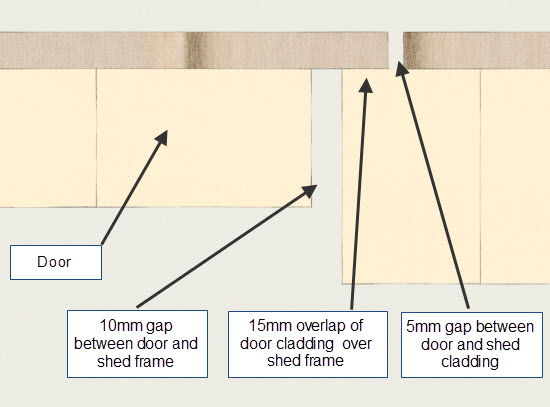 Suggested gaps around door and frame
Let's go step by step through the process of making a framed ledged and braced shed door
The first step is to cut the frame members to length. Decide the length of the frame members using the tips in the previous paragraphs and the clear door opening that you need for your shed.
For this door I used 3x2 treated dimensioned lumber for all of the frame but the vertical member on the closing edge of the door. I used a 4x2 for this piece to accommodate the Gatemate lock.
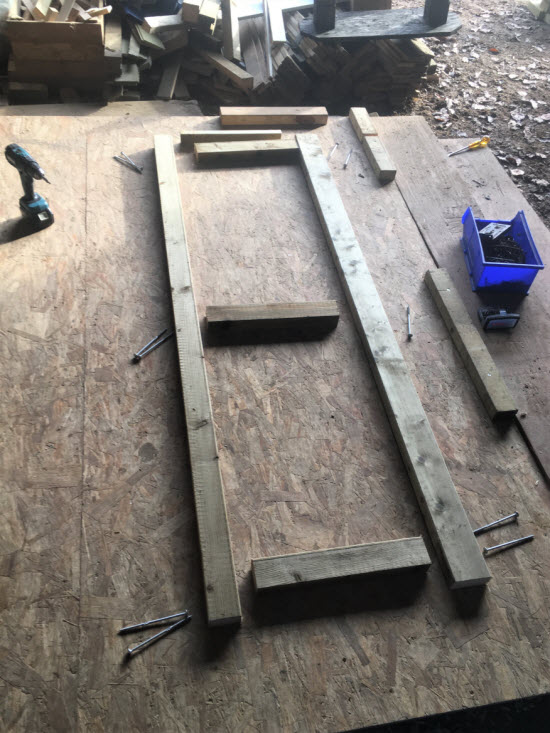 Layout of door frame before fixing
I made the door on a floor in the workshop, you could use the floor of your future shed. As you can see in the picture I screwed some lengths of timber to the two perpendicular edges to help ensure that the door was square. I also used a 25mm spacer to accurately get the edge distance of the horizontal timber.
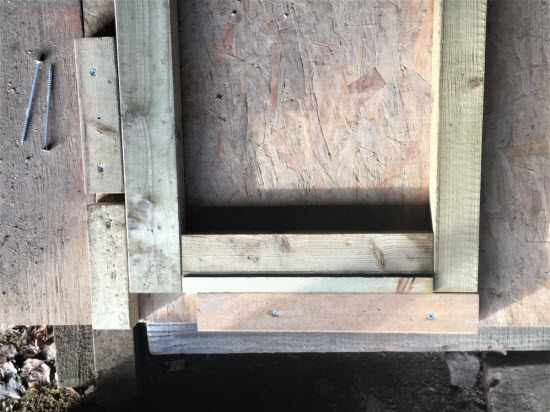 Using blocks and spacer to ensure door is square and location of lower horizontal
I used a drill/driver to install the timber screws. You can see in the picture below that I am installing the screws at a slight angle to the frame to achieve the 'dovetail' effect.
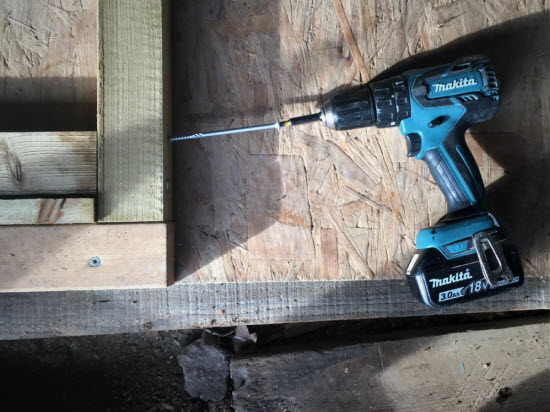 Using a drill/driver to fix the screws
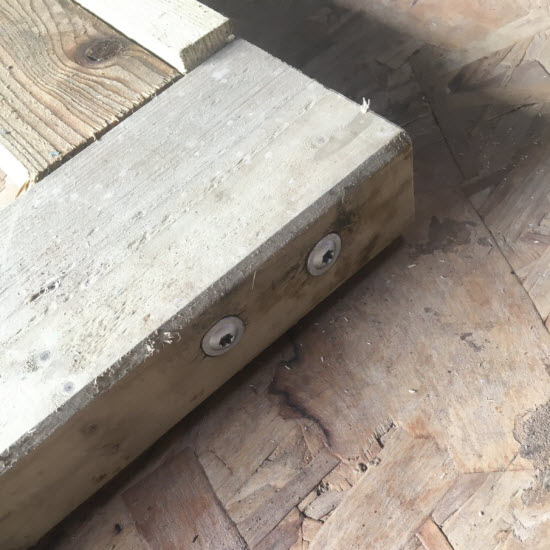 The finished connection with the wafer head Torx timber screws almost flush to the frame.
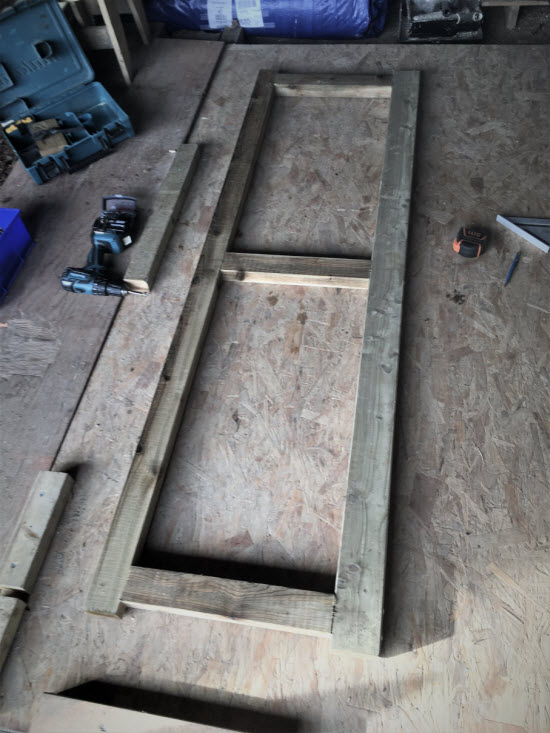 The bare frame is quite solid even before the installation of the face timber and braces.
The facing timber in this case is 12mm pressure treated shiplap. I used 50mm hot dip galvanised ring shank nails to secure the planks to the door frame.
Typically, the cladding nails used should be 3 times the thickness of the cladding that they secure.
As we are using the nails externally and using pressure treated timber, hot dip galvanised is the required nail specification. They have a thicker anti-corrosion coating than electroplated sherardized fixings.
Finally, the 'ring shank' or corrugations on the nail give it enhanced resistance to being pulled out.
You can see in the picture that I used a nail gun for the fixings. This isn't essential, for a 'one off' project a hammer will do just as well. I only started using a nail gun once I started building multiple sheds, where it saves a lot of time and effort.
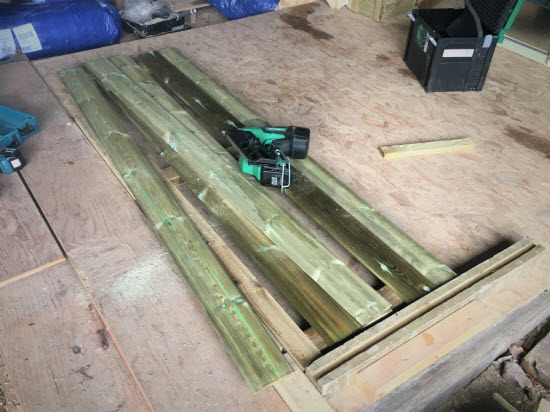 Starting to fix the door cladding
The braces are cut to length and then the angles cut so that they slide into the frame. Make sure you get them pointing 'up from the hinge'. Secure them into the frame with a timber screw and then nail them to the cladding from the front.
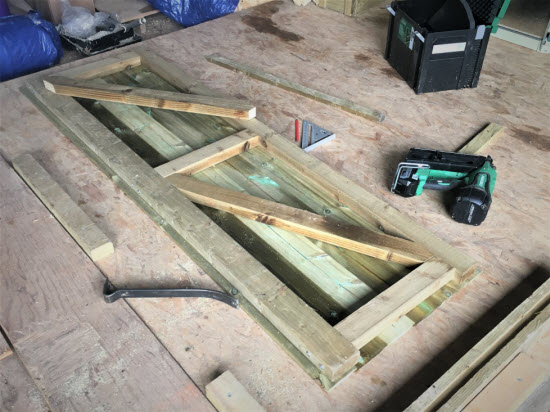 Fixing the braces
Summary
A framed ledged and braced shed door doesn't have to be difficult to construct. The protection to the joints afforded by the facing timber means that the screwed joints don't get wet or weathered in the same way that a gate or a door with the frame exposed do. This type of door is very suitable for constructing garden sheds. It is stronger than the slightly simpler ledged and braced door and it is ideally suited for use with the Long throw type shed door lock.


Keep in touch with our monthly newsletter
Shed Building Monthly