How to install a ground screw shed foundations without specialised mechanical equipment
Using ground screw shed foundations can save you time, money and energy when building your shed. You might think that to install screw piles that you need access to specialised equipment. However in the example that follows I will show that you don't necessarily need expensive specialist equipment. A bit of old-fashioned muscle power and ingenuity is a very good substitute.
What is a ground screw shed foundation?
For those that haven't come across ground screw foundations before they are a series of metal tubes with a welded helical spiral on the lower section.The individual screw piles come in a variety of lengths and have a method of connecting to a timber section on the top.
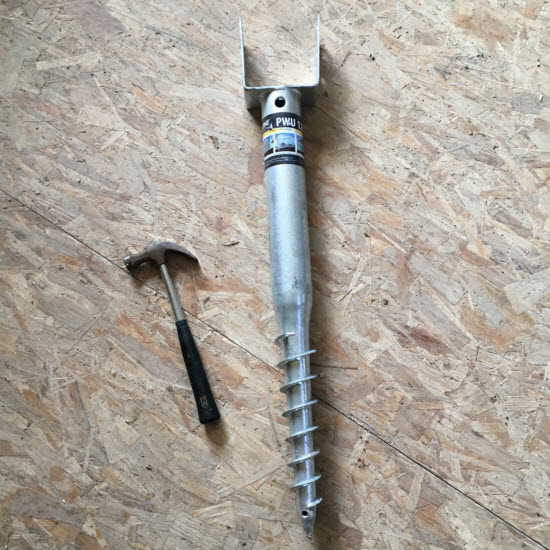 The type of screw pile that I used for this project with a hammer shown next to it for scale. It is about 80cm long from
the tip to the bottom of the 'U' head section.
The type of screw pile that I used for this project with a hammer shown next to it for scale. It is about 80cm long from
the tip to the bottom of the 'U' head section.
Why use screw piles?
I chose screw piles for this project as the ground was slightly sloping, there were no particular restrictions on height and the ground was suitable, grass underlain by a layer of fairly stiff clay.
A large tree had recently been felled immediately adjacent to the shed so excavating the site to level it would have been difficult with the presence of large roots.
Other benefits included the minimal weight of carrying the screw piles to the job site location and the lack of diggin and consequent disposal of spoil required for many other foundation types.
What are the steps in installing screw pile shed foundations?
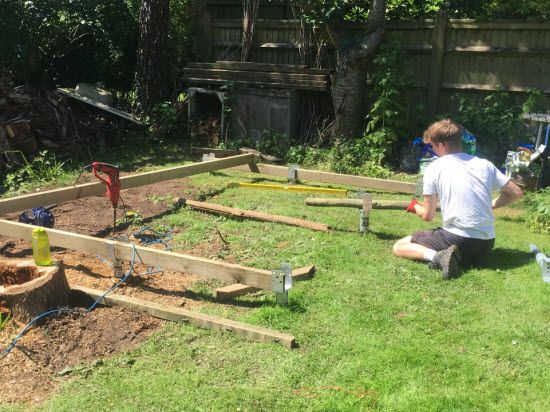
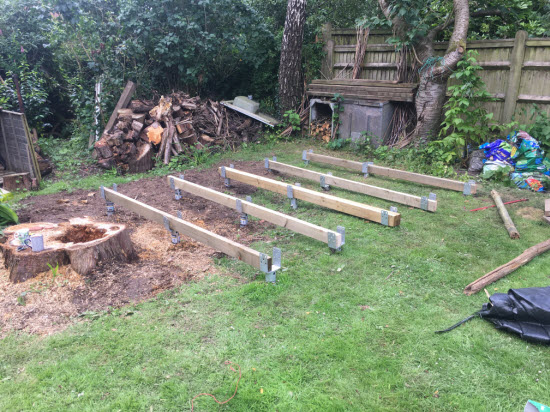
The first step in installing the piles was to mark out the site, identify the corners of the shed and the positions of the support beams. The shed floor was to be supported by 5 support beams each supported by three screw piles.
One useful tip is to 'investigate' each of the proposed ground screw locations
The reason for this is to confirm if there were any stones or tree roots at the proposed location.
So,each ground screw location was 'pre-drilled' using a 22mm dia 700mm long bit in a SDS drill.
Obstructions were encountered at a couple of locations and so the piles positions were adjusted by moving the position along the length of the beam. The size of the beam was such that this amount of movement could be accommodated.
How easy is it to install ground screws by hand?
Specialist pile installation companies use powered equipment for the installation of screw piles. However, for short piles such as these it is quite possible to screw them in manually.
Turning the piles gets progressively harder the further they go into the ground. The first 20-30 cm can be turned by hand, then you may need to progress to a piece of 4x2 timber centrally.
 Using a piece of timber to assist turning the pile
 For the last few cm you may need to use a fair amount of force.
It is encouraging that the pile gets more difficult to turn as it gets deeper, it is an indication of how strong the pile will be in axial bearing.
How easy is it to get the pile heads level?
One of the great things about ground screws is that the height of each pile can be adjusted by simply turning the pile, clockwise to go down, anti-clockwise to go up.
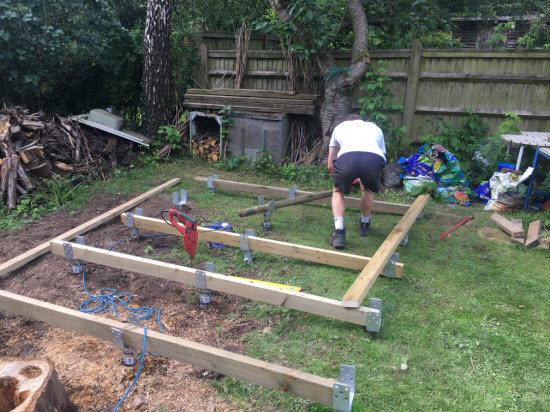
When adjusting the piles to final level start at the highest corner of the site and wind down the pile to the required level. Then adjust other piles on the same ground beam line using a spirit level to get the tops at the same height. Then put the timber beam in place so that you make a final check and any adjustments to get the top as level as possible.
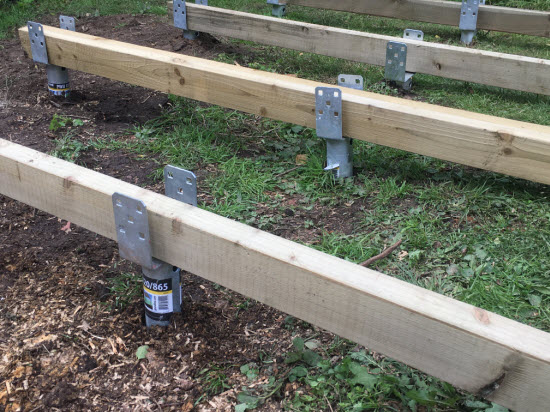 Close up of installed ground screws with beams temporarily in place
Then move on to the next timber beam line. As you move on to the next beam line make sure that the pile levels tie back to the first line that you installed. So eventually you will end up at the last line of piles. With them installed double check the levels across the whole base and measure across the corners to be sure that the whole base is both level and square.
 Close up of installed ground screws with beams temporarily in place
One more step before installing the shed floor
With all of the piles installed it is time to cover the ground below to prevent vegetation growth beneath the shed. This was achieved with a layer of black geotextile. This material is UV resistant and a series of slits were cut in the fabric to allow the piles to pass through. The membrane was held down with a layer of bark chips that were left by the tree surgeon when felling the tree. The perimeter of the membrane was held down with a line of bricks set just inside the building line of the shed beneath the floor.
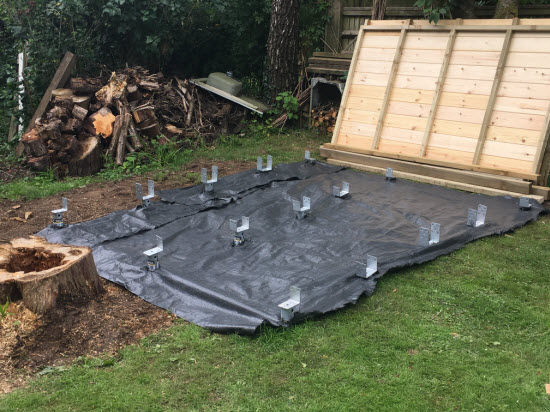 The ground was covered in geotextile to prevent vegetation growth
Shed floor installation
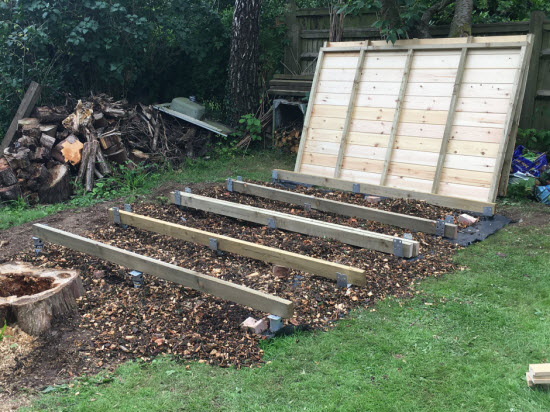
You can see from the pictures that I had pre-made the floor for the shed. The floor was made in two pieces so that it was possible to transport them to site. The pieces were to be screwed together once installed. The floors consisted of 50x50 pressure treated timber with 20x150mm timber floor boards on top.
 The geotextile was covered/
With the timber floor in place we now have a nice, solid level platform on which to assemble the shed panels. I looked at the time stamp on the photos and the first pile was installed at 12:30 and the final picture with the floor was taken at 15:30, 3 hours later. Not a bad time for constructing an 8x10 shed base from start to finish.
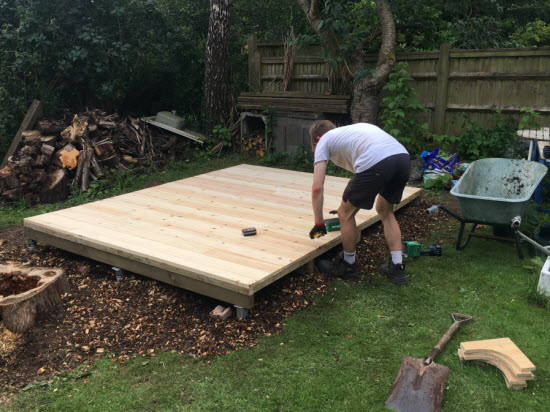 Three hours after starting, the 8'x10' shed base was ready to start erecting the wall panels.
Summary
The steel ground screw shed foundation is a great option for creating solid platform on which to build a shed. There is minimal preparation, they are quick to install, each of the piles is easily adjusted for height and there is little mess or waste to dispose of after installation.


Keep in touch with our monthly newsletter
Shed Building Monthly