Build Sequence of a DIY Garden Shed
This Must be the Strongest DIY Garden Shed I Have Come Across!
I love it when readers of this site send in pictures of their projects and details of how they overcame specific problems to achieve a great result. Cherry Douglas from Orpington in Kent sent in these photos of a shed building project that she and her husband Ian (well....as you will see from the photos it was mainly Ian!) successfully completed. I really liked the way these photos fitted into a sequence, so I made them into a Photo story.
The words are mine and I hope not too cheeky!
Enjoy......
 |
|
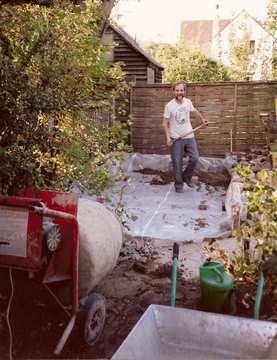
Photo 1. Just getting started with a spot of digging. Good to see that polythene damp proof course going in beneath the concrete shed base |
 |
|
Photo 2. Doing a great job of keeping those blocks level and keeping the site tidy as work progresses. |
 |
|
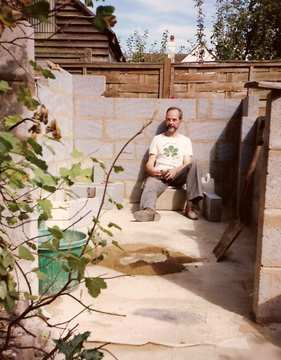
Photo 3. With the walls up to window sill level it must be time for a cup of tea! |
 |
| Photo 4. Nice cup of tea that. Shed starting to take shape now that those window frames are in. |
 |
|
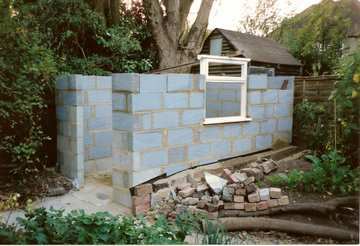
Photo 5. With the completion of blockwork up to eaves level. A timber plate is fixed to the top of the wall and shed roof construction begins. |
 |
|
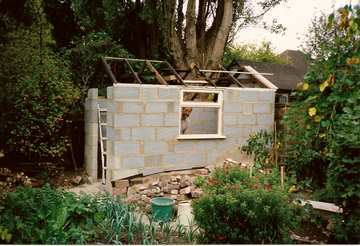
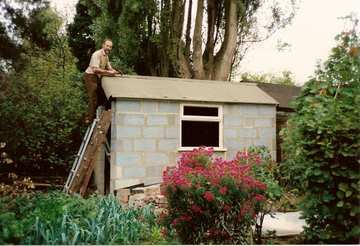
Photo 6. Hmmm.. best get that shed roof covered before we get one of those summer showers. |
 |
|
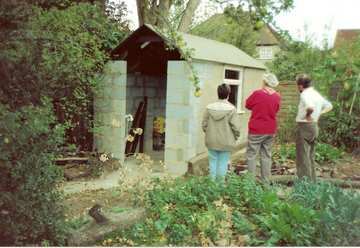
Photo 7. This must be the best bit, when the neighbours come round to admire the fruit of your labour. |
 |
|
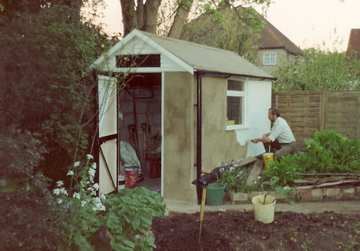
Photo 8. With the blockwork rendered and the gutter installed, just time for a nice coat of white paint to finish the job. |


[?] Subscribe To This Site


Custom Search
Keep in touch with our monthly newsletter
Shed Building Monthly