How to dismantle a pallet
The reason you might want to dismantle a pallet is that the wood is essentially free. Making your shed building a lot cheaper ;-).
There is a long history of people using wooden delivery pallets to build sheds. There are some quite ambitious constructions if you search.
Pallets are widely used and in some sectors, particularly in the building industry it seems, they are only used once.
A downside of using pallets is that often they are too small to make a decent sized panel without connecting two or more pallets together. Connecting the pallets together can take more time and timber than is justified by the free wood.
On finding some large, clean pallets to dismantle
I wanted to try building a pallet shed and spotted my opportunity when a local house was being renovated. The pallets that the drywall was delivered on were huge, 2.4x1.2m. Also the timber looked relatively clean and new. I checked with the contractor that it was going to be OK for me to take the pallets. The contractor was pleased that I was taking them as he said that they would only have been burnt otherwise. It is always important to get permission to take anything from a building site, don't take anything without asking the site manager.
The only negative point of these pallets was that the surface timber strips were quite far apart. However there were three pallets on the site and one of them was damaged. So I quickly realised that if I dismantled the damaged pallet I could use the timber to infill the gaps on the other two.
My previous attempt to dismantle a pallet had been disappointing
I ended up damaging the wood. Meaning that I ended up with a pile of matchsticks. Not the clean free timber that I wanted... grr
Since then I have watched a few Youtube videos. Which gave me some techniques to try. I also learn't a few things about how to dismantle a pallet during this experience. These should help if you ever decide to go down the pallet shed route.
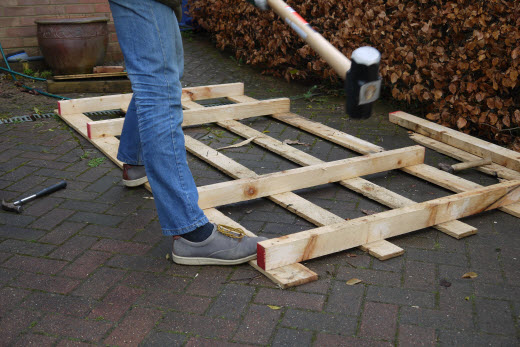
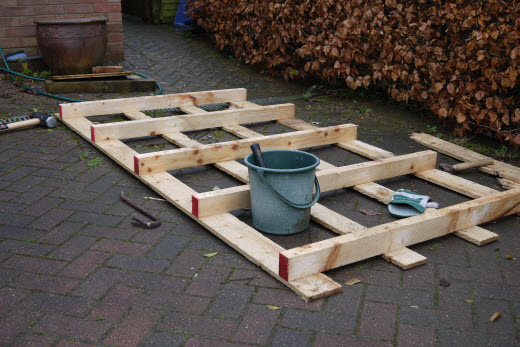
You can see from the picture that the pallet is big. This is damaged, as one of the top strips is smashed. This is the one that I am going to take apart.
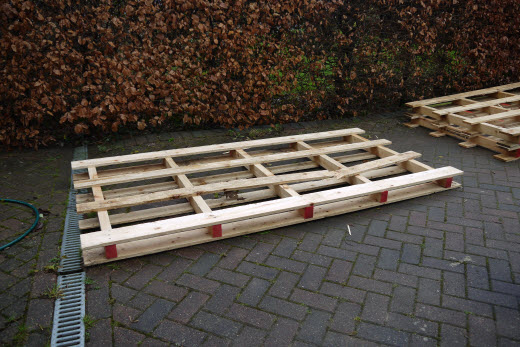
The pallets are generally held together with two nails at a cross section.
Except on the edge intersections where there are three nails. I expected that these would be more difficult to take apart.

Tools required to dismantle a pallet
The tools that I used for dismantling the pallet were:
- 4lb lump hammer
- Claw hammer
- 10lb sledge hammer
I used these in different ways.
There were three different techniques that I used
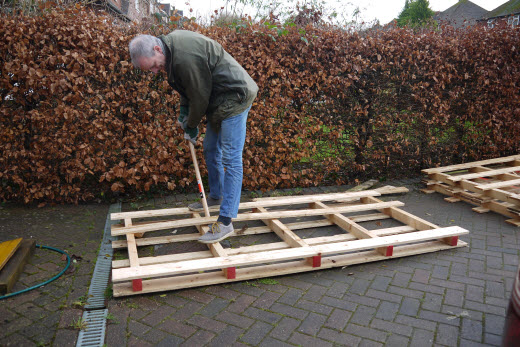
- Using the 10lb sledge hammer as a lever. Putting the end of the hammer between the upper and lower timbers. I used the long handle as a lever to open up the joints.
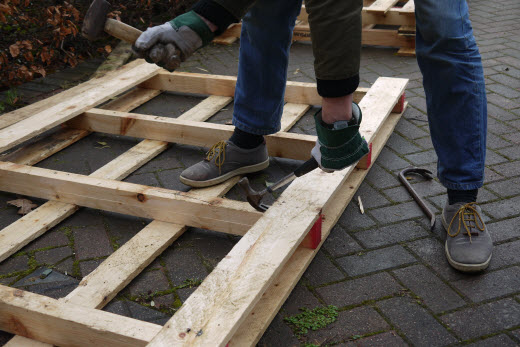
- Using the 4lb lump hammer, I drove the claw section of the claw hammer into the junction between two timber pieces. The first part of this uses the claw as a wedge. Then when the claw is driven in the handle of the claw hammer can be used as a lever to open up the joint.
- Use the 10lb sledge hammer to 'roll' a section. I used this towards the end of the dismantling process. It was relatively easy to roll single sections like this. But when all of the cross members were connected by the surface strips the prying method worked better.
Lessons learned from dismantling a pallet
It was interesting to learn from how the pallets came apart as a result of this hammering and prying.
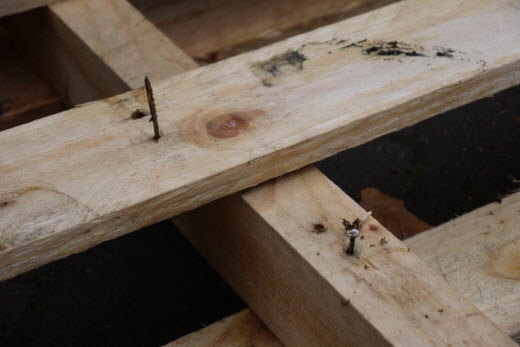
On some joints the head of the nail stayed in position and the pointside part of the nail came out.

On other joints the heads of the nails pulled through the surface strips and the points of the nails remained embedded in the timber below.
On yet other joints a combination of the two occurred.
Stages of dismantling a pallet
 Taking the top timbers off the pallet
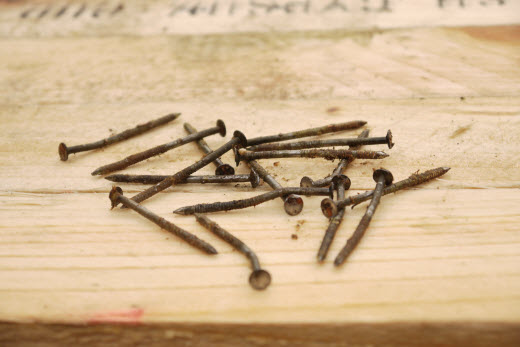
 All the top timbers are off. Remember to keep those nails in a bucket so they don't end up in your car tyres.
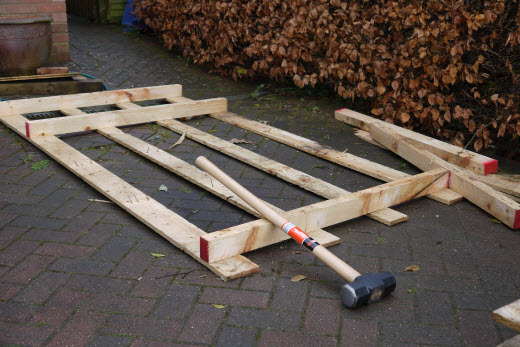 I used the 10lb sledge hammer to 'roll' the cross members.
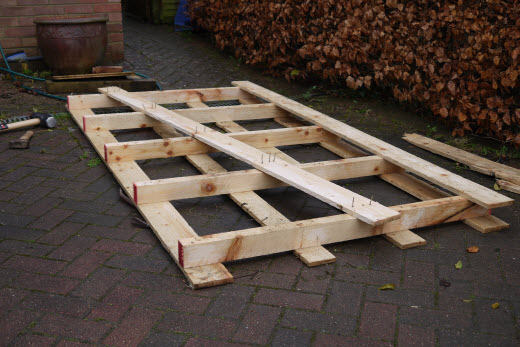
 The final stage. All the cross members removed. Just need to de-nail the bottom timbers.
Lessons learnt from my pallet dismantling experience
In my previous experience of pallet dismantling, the timber had been quite brittle and the nails corroded. In hindsight this was a result of the pallet age. The timber had seasoned and lost some of its moisture. Also the nails had corroded. The rust on nails takes up several times the volume of the original metal. This gave the nails a better grip on the timber.
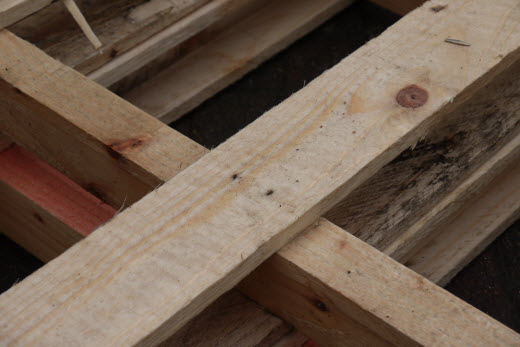
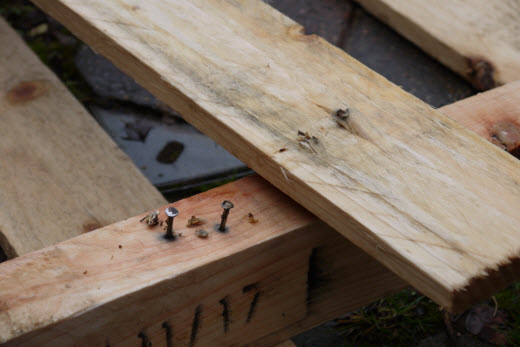
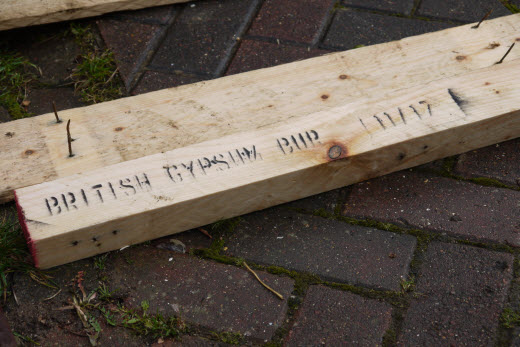
Looking at the most recent pallet I saw a reference number that confirmed that the pallet I was working on was less than a month old. The number 11/17 on the picture below refers to November 2017 and I dismantled this pallet in mid-December 2017. The young age of the pallet meant that the timber was still quite green (it being a wet winter helped too!).
The nails hadn't had time to rust and improve their grip on the timber.
So with this pallet I was lucky! It was a well made, but the combination of a young age and wet winter meant that the timber was clean and it came apart easily.
The next step of this project is to build the pallets into a lean-to shed. But that is for another day. To keep up to date with this next stage add your name to my monthly magazine - Shed Building Monthly


Keep in touch with our monthly newsletter
Shed Building Monthly