8 tips for getting the best out of your Oriented Strand Board (OSB)
OSB is a great material that can replace plywood for many uses. There are a few basic rules to get the most out of this material. They are fairly straightforward but each one is fairly specific.
So read on to make sure that you make the most of this material:
Use the correct thickness of board for the proposed use
The thickness of OSB that you need varies on where it is used in a building. Typically 3/4"(18mm) for floors and 3/8" (9mm) for walls and 1/2" (11mm) roof. Also make sure that you get your supporting timbers at the correct spacing. Most OSB suppliers have a load/span table giving a guide to the spacing of timbers for different thicknesses. Or just have a look at the table below.
OSB panels are stronger in one direction than another.
Although OSB might look like a random selection of fibres stuck together, it consists of three layers. In the outer face layers the fibres run in the long direction of the panel. In the core the fibres run in the short direction of the panel. The reason for this is to maximise the strength of the board, however it does mean that the panel is slightly weaker in the short direction. As a double check make sure that the panel writing is at right angles to the span of the boards.
All edges need to be supported. With joists, studs or noggins
To stop boards moving relative to each other the edges must be supported. A typical example is in the diagram below.
Minimum bearing distance.
To prevent the end of a board just snapping off then it needs to have a minimum supported length. This minimum length is 18mm. So if you have the ends of two board meeting on a joist then the joist needs to be a minimum of 40mm wide (2x18 +4). The extra 4mm is a bit of tolerance, just in case you don't set your joists out perfectly. ;-)
This minimum bearing distance is likely to be more of an issue where boards meet than for internal spans. Very few timbers in shed building are less than 18mm.
Type of fixing
Use 3mm dia ring shank nails. Min 50mm long for roofs and 2.5 times the thickness of material that you are nailing through.
The diameter of the nails is important as if they are too thin then they won't grip the timber sufficiently. If the nails are much thicker they will start to splinter the timber and once again wont get sufficient grip as they disrupt the material.
Using ring shank nails means that the ridges in the metal get a good grip on the timber. A ring shank nail has a 25% greater pull-out strength than an equivalent nail without the ridges. Using these nails gives your construction that extra bit of oomph.
Spacing of fixings dependent on thickness of board and whether edge or internal.
Fixing the OSB to the floor wall or roof demands that you get the nail spacings correct. Nails are at closer centres around the edge of the board and further apart on internal members. The biggest point to note is how close nail centres are on flat roofs. Wall sheathing is next, with the largest spacings used for flooring.
Edge distance - 8mm from a panel edge
A fairly common sense one this. Don't nail a panel too close to the edge. This distance makes sense as it is about half the minimum bearing of 18mm (see point 4). Nails too close to the edge of a board will be ineffective and just pull out.
Gluing joints over support increases strength
This point is a nice to have and not essential. But if you place a line of wood glue along the joist before nailing it in place the board and the timber will move together as a composite. This sort of effect is most appreciated on floors and trafficked roofs. With the board and timber moving together the floor is 'stiffer' and deflects less. Also the floor will be quieter as there will be less squeaking due to the floor and decking moving relative to each other.
 Table showing maximum spans for various thicknesses of OSB for different applications (dimensions in mm)
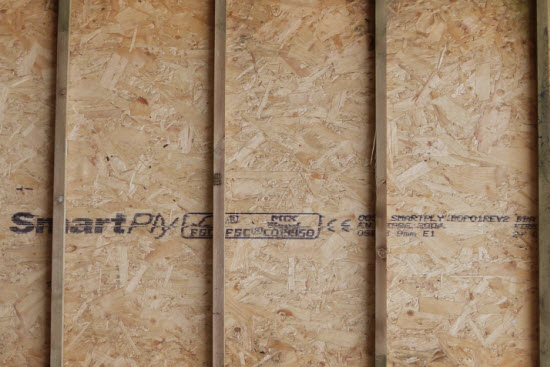 The text running in the direction of the span
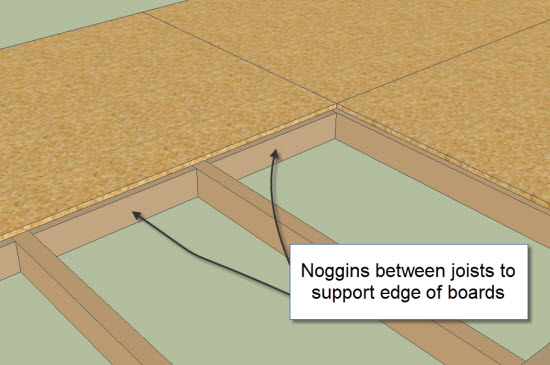 Edge of floor panel supported on noggins.
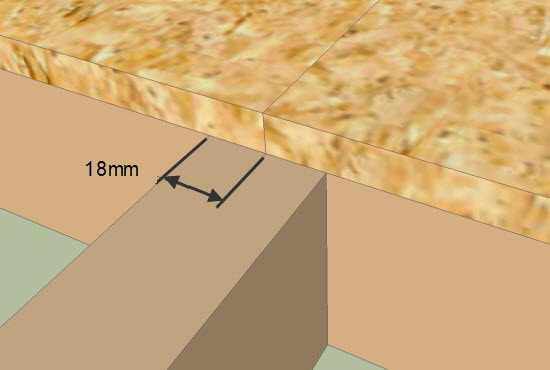 Minimum bearing distance
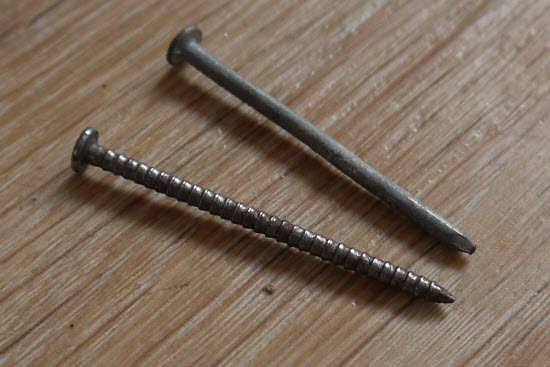 The rink shank nail below has 25% greater pull-out than the plain nail above
 Nail spacing is same for internal and intermediate nailing for floors. But differs for siding and pitched roofs
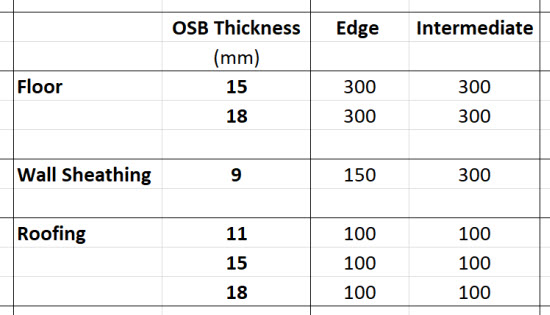 Table showing nail spacings for differing OSB thicknesses and applications (dimensions in mm)
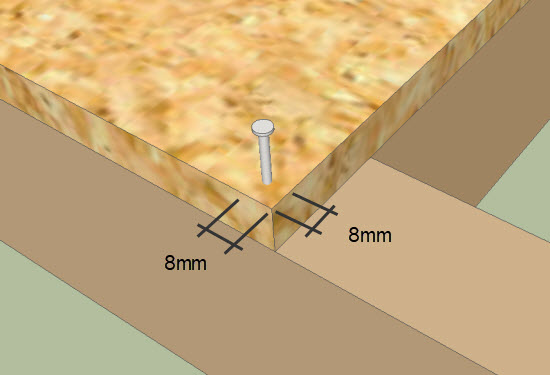 Treat 8mm as the bare minimum edge distance. Try to get a bit more if you can.
So there we have it.
If you follow these 8 basic rules you can't go far wrong using OSB for your shed floor, walls or roof.


Keep in touch with our monthly newsletter
Shed Building Monthly