Building a school storage shed (and bringing it in on budget)
The 3500 GBP that was quoted for a new 16'x10' School storage shed was too rich for the Parents Association budget. Their account only contained funds that they had raised themselves. Luckily for them Andrew Ross, one of the parents at the school, was on leave between jobs. He had the time and the inclination to do the work but no previous experience of a project this size.
Could Andrew take on this project and bring it in successfully under budget?
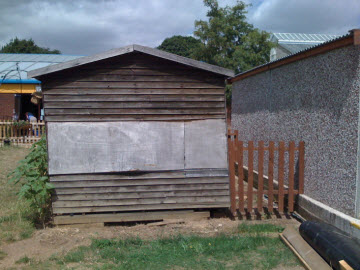 The old school shed
The old school storage shed had been around for 12 years or so, it was looking tired and shabby but most importantly it wasn't as secure as it had been. As with most schools the site was unattended after school hours and so if anything was locked away it had to be in a secure building. The old shed, as you can see from the pictures, wasn't very secure looking at all.
The instructions from the school was that the new shed was to be of a similar size and shape as the existing one.
The initial stage of the project was to create some plans
Despite extensive internet searches Andrew could not find plans of the size and design that he was looking for. Brushing off his technical drawing skills from his school days he prepared his own plans.
One of the design problems that he faced was that he would be working mainly alone and also the new shed was going to be built very close to an existing concrete garage ( as you can see from the photos).
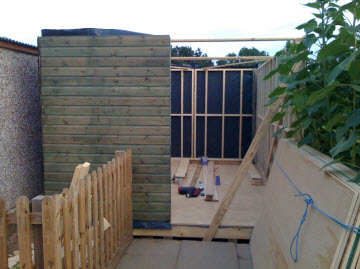 The new shed was to be built very close to a concrete garage
Because the new school storage shed was so close to the garage the wall panels needed to have the 18mm shiplap cladding nailed in to place before the panel was lifted into position.
After the panels were lifted into position there would be less than 3 feet of space between the shed and the garage and so fixing the individual shiplap boards in place would be nigh on impossible.
 The walls were built in a series of panels
The other restriction of working alone meant that constructing the whole wall in one piece 2m high and 4.8m long before tilting it upwards was also a non-starter.
To overcome these twin problems Andrew designed the walls in four panels which he could lift into place by himself. The next problem was the roof.
The roof presented a design challenge
 The rafters spanned from the walls on to a central ridge beam
Andrew consulted a friendly structural engineer who calculated the size of the ridge beam that was needed to span the 4.8m length of the shed and support the roof.
The engineer also confirmed to the schools Health and Safety Officer that the design that Andrew had drawn up was structurally sound and posed no threat to the ‘little darlings' in the playground. With the design complete it was time to move to site
Construction started with Andrew levelling the ground
There was a 5 inch cross fall in the place that the school storage shed was to be built. Levelling the site took a surprisingly long time to level so that the five 4x4inch skids which were to support the shed could be installed.
With the skids in place
 The shed floor
The floor, supported by 6x2 timbers was built on top of the skids. The side panel frames were constructed, lined with building fabric and then clad with the treated tongue and groove boards. The panels were then lifted into place to form the four walls of the shed.
The roof was supported on a roof beam made from two 9x3 timbers spanning the whole length of the shed.
The construction of the new school storage shed was going really well but how was the budget?
Andrew was very keen to keep costs down and going back to the PA for more money that they didn't have was not an option.
As a matter of course Andrew shopped around for the cheapest source of quality timber. The time and labour that Andrew, his wife and two daughters put into the project was of course not charged at all.
Andrew already had some power tools that are almost essential for singlehandedly constructing a building of this size. One tool that he needed but didn't have was a nail gun for the many thousands of nails that were needed to join the timbers and fix the cladding.
Hiring a nail gun was not an option
 Using the nail gun to fix the ship lap cladding
The cost of hiring a power tool soon becomes a big part of the purchase price and the gas and nails are an additional cost.
A discussion with a local tool supplier supplied the innovative answer. The way forward was to purchase the nail gun and then resell through Ebay in almost mint condition on completion of the job.
A tool that has been used in this way would only lose about 20% of its value, a big saving on the hiring or straight purchase option.
Andrew worked on the project most days for about 6 weeks
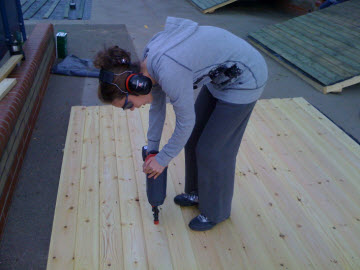
 Andrews helpers
This started with the ground works to the final stages of fixing the cladding. He worked mainly alone but did get some help from his wife and daughters as you can see from the pictures.
Did Andrew bring the project in under budget?
Of course! The final cost of the new school storage shed including the purchase and sale of the nail gun came in at just under 2200 GBP. That is a big saving on a project this size and all credit to Andrew for helping out his school.


Keep in touch with our monthly newsletter
Shed Building Monthly