Overcoming Shed Building Problems

by John

Rome wasn’t build in a day.

The course of true love never runs smooth.

You could add to these tried and tested sayings; If you build a shed you will encounter problems.

For most people building a shed will be a one-off project. Starting from zero knowledge, learning about the task they are about to undertake and finally ending up with a serviceable storage building.

During the course of the project you will inevitably encounter problems as part of the learning process. Mistakes will be made and overcome. To illustrate this point I wanted to highlight a project undertaken by a reader of this site Ron Clemens.

During the summer I received this question in my email from Ron


Ron Clemens lives in Saskatchewan, Canada and had reached the point in his project where he was ready to install his shed windows.

"Dear John
I'm fairly new at wood-working, and recently started building a shed. I planned on using a 20” x 30” Prestofen slider shed window, and upon asking a “window expert” at Home Depot how big to make the rough opening, he assured me it should be 20” x 30”.

I didn’t buy the window at that time, but went ahead and framed the shed wall according to this specification. I reached a point in construction where I was ready for the window installation, and so went back to Home Depot and purchased the window. Assuming that the outer “flange” of the window would mount flush against the exterior wall sheathing, I was disappointed to discover that the actual outside dimensions of the window are less than 20” x 30”, making the entire window smaller than the rough opening."


We exchanged a few emails to discuss the problem and Ron continued with the build.

It was great therefore to receive this update earlier this week


"For the window blunder, I ended up building up the window framing, then re-sheathing that part of the wall and cutting the rough opening to the correct size. It all worked out in the end. I was able to find some recycled cedar siding for the exterior, which I liked since it was an environmentally conscious choice.

As the building of my shed progressed, it came to be known in my eyes as "the monument to my incompetence"...hehe! But then again, maybe if other people see that a completely clueless rookie can stumble through and end up with something acceptable, they might be inspired to take the task on themselves."


I was interested to see how Ron's shed building project turned out

Ron was kind enough to share some pictures of his shed build and I think that you will find them very interesting.

shed foundations
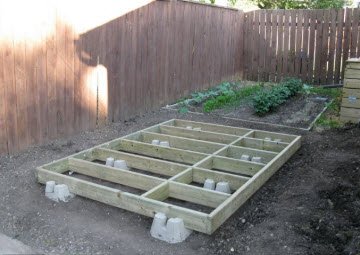
Nice shed solid foundations and floor construction

shed wall
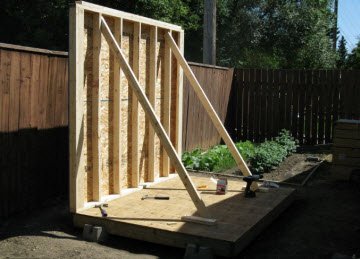
First shed side wall in place and temporary braces in position until other walls are completed

shed wall
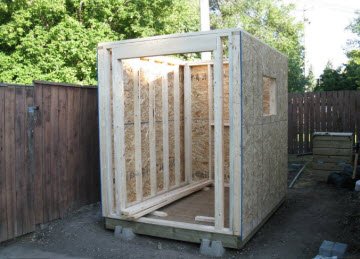
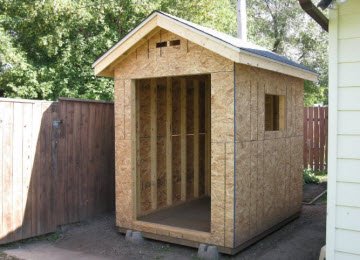
All four walls in place, temporary bracing no longer required

shed roof
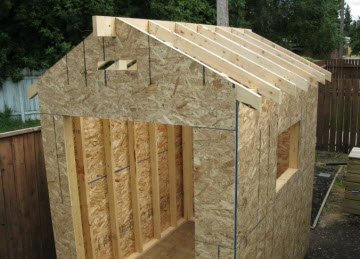
Structure of shed roof in place. Roof is supported on a central ridge beam.

shed structure
The structural shell of the shed is complete and ready for housewrap

shed with house wrap
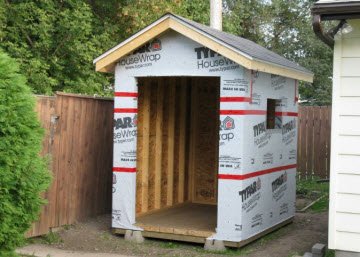
House wrap applied and ready for installation of trim and siding

shed with cedar siding
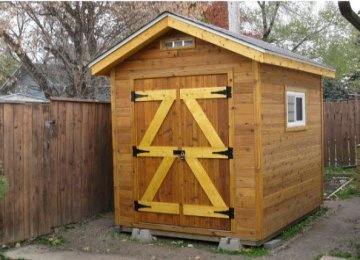
The completed shed – a job well done!

shed with cedar siding
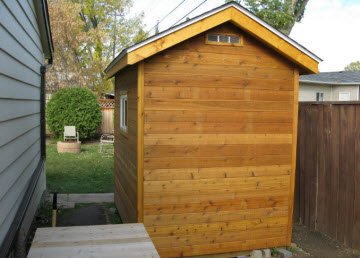
Close up details of shed siding at the back of the shed

I think that you will agree that is a great result a fine looking shed that I am sure will last through many Canadian winters.

One construction saying that I would like you to remember as you progress through your project is that ‘The job always gets built’.

I have come across this saying on construction sites wherever in the world I have worked. As you work through your shed building project I think that you will find it as true for Ron as it will be for you.

What problems did you overcome during your shed building project?


Please share your experiences in the comments box below

Comments for Overcoming Shed Building Problems

Average Rating starstarstarstarstar

Click here to add your own comments

Rating
starstarstarstarstar
Omg!!! He's going insane!!!
by: Emilie

My fiancé is going crazy trying to build this shed!!!! He's extremely smart, but is a perfectionist and over thinks everything!!! He is so scared that he's going to screw something up, so he is at a dead halt - at the base.... He has about 5 questions and can't find the answers anywhere. He just wants to make sure that he's supporting properly so hat he wont have to disassemble it. I feel so bad for him because the project he was most excited about, he now dreads. Please help!!!!!! Emilie.nelson@gmail.com

Rating
starstarstarstarstar
Nice Site
by: ITFarmer

I wish I would have found your site before building my own shed. I'm more of a computer guy then a carpenter, but somehow I managed to keep it from falling over when I was done = )
Here's what I was left with when done:

http://itfarmersblog.com/?page_id=1543

Rating
starstarstarstarstar
Barn style Roof
by: Anonymous

I am in the process of building my 3rd shed with a barn style roof (don't know the proper name) and never take the time to make a template for constructing the roof trusses to ensure they a consistent shape. As a result, I always end up having to shim the outsides of some trusses to make them even before installing the sheathing or strapping. This is unnecessary work that I think could have been avoided by making a template on the floor and making the trusses accordingly.

Rating
starstarstarstarstar
green roof
by: Anonymous

John,

Shed will be 8'x8' (that's all I can fit in) I've seen other projects that use EPDM will investigate further when I get to that stage.

Mark

Rating
starstarstarstarstar
Great problems so far! Keep them coming
by: John C

@ Joe - Thanks for sharing your problem. Getting the blocks level is always a challenge. Start with getting the corners for one of the long sides in at the right level and then work on the blocks in between. When you have all of these in right work on the next two corners and then the between blocks checking back to the reference blocks at each stage.

Your perseverance at this stage will be repaid when you construct the floor and then the walls and everything is ?dead? level.

@ Mark - Well done on progressing towards your green roof project. To keep the roof as simple as possible I would continue with the box type idea keeping the roof joists level. On top of the joists you can introduce a ?firring? strip to introduce the fall on to the roof so that there is some positive drainage and you don?t get water ponding. I would recommend using an EPDM rubber roofing membrane. These sheets come all in one piece and have a long lifespan, so minimise the possibilities of leaks.

What size shed are you looking to build?

@ Simon - Well done on building your 'oestrogen retreat'. And great solution to overcoming the problem with your water main.

I have a house built in the 50s also. The water main is about 3 feet down and reached the end of its life last year and developed a leak. I had to have the whole thing replaced......ouch!

John

Rating
starstarstarstarstar
Level?? What do you mean Level?
by: Simon

I purchased a simple tin shed to construct for a place to store my motor bike and escape the rigures of being the only male in the house. My front lawn slopes so I dug down approx 100mm (4 inches) and discovered that when my house was built in the 50's 80mm (3") was how deep the water mains were planted... so I built UP!
Retaining walls 300mm high, and a nice long slow ramp up to the newly installed patio means that not only do I have a shed, but a nice area outside to enjoy the Summer afternoons.

Rating
starstarstarstarstar
green roof
by: Mark

I'm at the planning stage for a shed/garden office, I want a flat roof and preferably a green (plants not colour) roof. My problem is working out an easy way to build the roof while keeping it simple both in looks and construction.

I've thought of building the basic shed as a cube with a false sloping roof.

Mark

Rating
starstarstarstarstar
leveling
by: Joe

My problem is getting started. I want to build a 12x8 shed on a using blocks as a foundation. The site is not very level and I'm having trouble leveling the blocks using the 8 foot 2x4 and level method. If I get them leveled north/south then the east/west is off.

Rating
starstarstarstarstar
Wrong building sequence
by: Bill C

I work in construction so thought that building a shed would be a straight forward operation, I mean sheds are a lot smaller than office buildings, right?

Well my problem was that I got my sequencing wrong. I fitted the roof sheathing and shingles before starting to install the soffit boards. The reason for this was to keep out the weather.

It did keep the inside of the shed dry but cutting all those soffit boards and trim to shape and then holding them in position whilst working around the already fixed roof was a major headache.

Next time I would install the roof trim and soffit boards before the roof sheathing.

This apparently minor mistake cost me a lot of time and effort.

Bill


Related posts:


Click here to add your own comments

Return to Building a shed case studies.

Custom Search

Keep in touch with our monthly newsletter

Shed Building Monthly

Email

Name

Then

Don't worry -- your e-mail address is totally secure.
I promise to use it only to send you Shed Building Monthly.